InAnother Crab’s Treasure, you may want to create different builds.
Alternatively, you might forget about all that and turn Kril into a tank to minimize damage taken.
There are 32 achievements waiting in your crustaceous adventure in Another Crab’s Treasure.

Learn how to get them all with this guide!
There are quite a few stowaways in the game, and finding them isn’t exactly easy.
Luckily for you, we’ve prepared this guide.

All Stowaway Locations
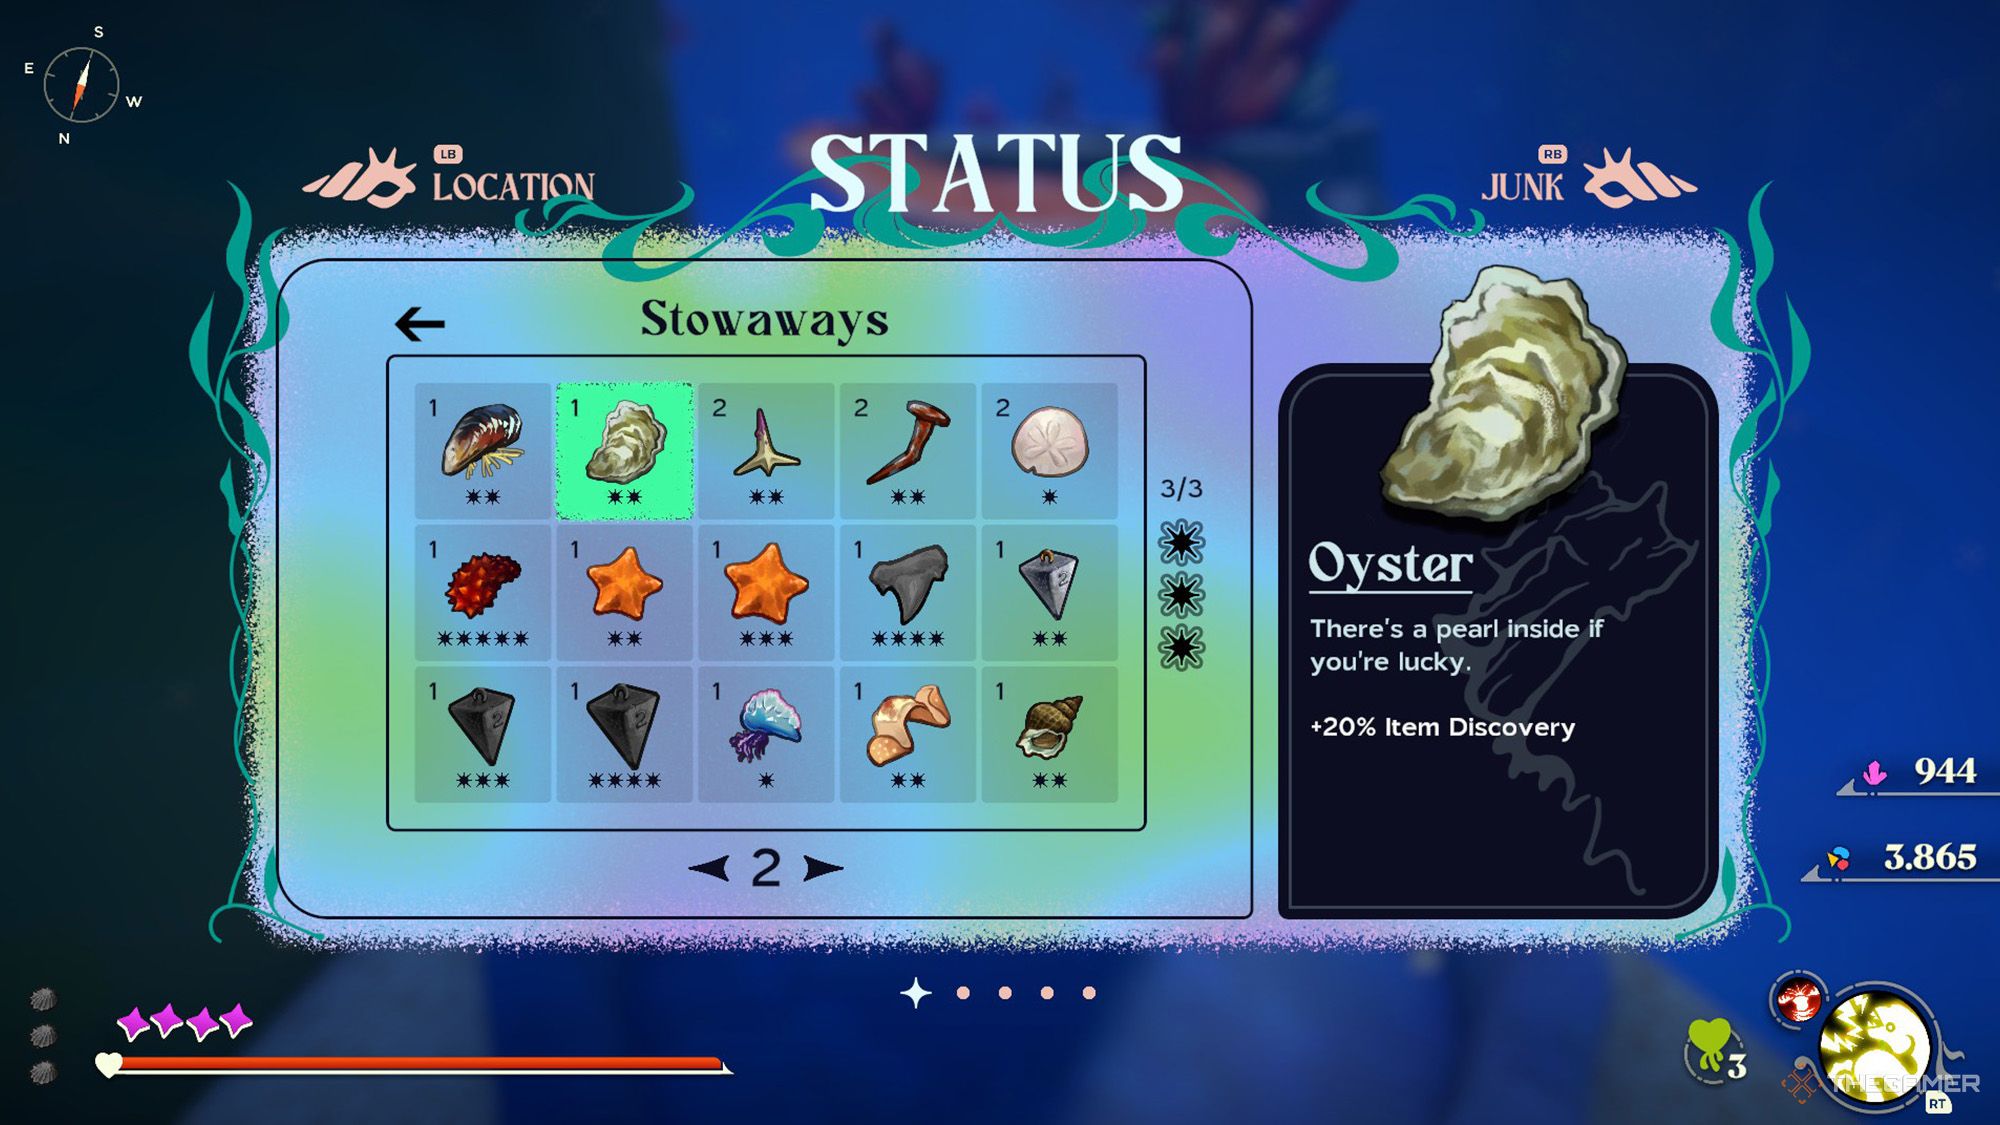
There are atotal of 68 stowawaysin the game.
Some stowaways may have multiple acquisition methods, while others may drop from various enemy types.
Additionally, don’t forget toincrease your stowaway capacityto be able to equip more stowaways.

To find the stowaways mentioned in this guide, don’t forget tostart from the nearest Moon Snail Shell.
As you approach the wall, you willsee three rusty columns of a bridgeto the southwest.
You will find this stowawaybehind the farthest column.

Sea Star
+3 VIT.
Proceed straight east.Pass through the sand wall gate.
In this corridor-like area, go a bit east, then head west.

At the end of the cliff, you will see this stowawaybetween two crayon fences.
Sponge
(18 MSG Required)+33% Umami Regeneration from attacking.
Proceed straight east.Pass through the sand wall gate.
In this corridor-like area,go between the first and second sand towersclosest to the entrance.
Climb onto the rock there.
Look up, and you will see a hook above you.
Grab the hook and reach another hook to the south.
Another Crab
Revives you once upon death, at the cost of this Stowaway.
Reach the location of the previous stowaway.
Additionally, this stowaway can alsodrop from certain enemies.
For example, there is a chance to obtain this stowaway bydefeating the laser-shooting massive crabsfound in The Unfathom.
Sand Dollar
Vanishes on death, but prevents you from losing microplastics.
The stowaway is on top of this wall.
Head north andenter Fort Slacktide(it should be in its corrupted state).
The Shallows - Slacktide
It is located on the wallsouth of the Moon Snail Shell.Between two execution poles.
Whelk
(2 RES Required) +15% Shell Spell damage.
Enter the tower located northeast of the Moon Snail Shell.
Climb onto the tower using the fishnet.
You will find this stowawayat the top of the tower.
The Shallows - Moon Snail’s Cave
Head south, then turn west and enter the cave.
Reach thegreen fishnet.Then, use the fishing rod shortcut to your west to climb up.
Ride the jellyfish across, and it will take you to the area where the stowaway is located.
Lamprey
(28 ATK Required)+3% Health Drain.
Theprice is 2,000 microplastics.
Lug Nut
+33% ATK, but reduced attack speed.
Theprice is 3,000 microplastics.
Packing Peanut
Take no damage from falling into abyss.
Theprice is 1,000 microplastics.
Razor Blade
-33% ATK, but increased attack speed.
Googly Eye
(20 VIT Required)-50% Affliction Buildup from mental attacks.
After passing through the lifebuoy,proceed northeast, and you will see the blue glow of this stowaway.
Rusty Nail
(3 RES Required)+4 ATK, -3 MSG.
After a bit of progress, you will see this stowaway on your left.
Phytoplankton
(19 MSG Required)Consuming a Heartkelp Pod regenerates a small amount of Umami.
Salp
(20 MSG Required)+6 MSG.
-30% Umami Regeneration.
After landing,proceed northeastbut don’t stray too far.
Fall into thehidden sand pit.
If you’re free to’t find this sand pit trap, proceed carefully, observing the sand.
You will find this stowaway inside the pit.
Fredrick
(25 VIT Required)The soul of a financially-savvy fish.
As you go a bit west andreach the icon of a single chain on your map, proceed northwest.
Below one of the chains, next to a gravestonewith two Heartkelp Pods, you’ll find the stowaway.
Sea Slug
(35 ATK Required)Increases effectiveness of dodge rolls.
(To obtain this stowaway, you need todefeatGrovekeeper Topodaand learn the Mantis Punch adaptation.)
From the hilltop where the fast travel point is located, jump towards the west.
After going a bit west and reaching the icon of asingle chain on your map, head southwest.
Take the cliff to your right.
As you progress enough, you’llsee a hill with a boomboxto the west.
Jump down from there and head a bit more towards the northwest.
Limpet++
+6 RES, +1 DEF.
(To obtain this stowaway, you need todefeat Voltai, The Accumulatorand learn the Eelectrocute adaptation.)
Use the magnet, along with a steel-key in shell, to go up.
Get to the top of the blue fishnet.
Lumpsucker+
(40 VIT Required)-70% Affliction Buildup from pollutants.
From this angle, you’ll see the yellow glimmer of the stowaway on top of the anchor.
Open your map and head north towards the broom.
Additionally, if you look carefully at your map, you will see the icon for this carton.
Use the air current to ascend and latch onto the hook to the east.
After reaching the second hook, you will see the yellow glow of the stowawayon the ledge with seaweed.
Sinker+
(35 ATK Required)Attacks deal +35% Balance damage.
The Sands Between - Flotsam Runoff
Proceed westward.
Reach the areawhere the robot crab is locatedand activate it with the Eelectrocute adaptability.
Cross to the other side via the bridge brought by the crane.
Head southwest, and after climbing the steps, turn to the east.
You’ll find this stowawayin front of the red coral.
Anemone++
+6 MSG, +2 RES.
Start from where the previous adaptation was found.
Jump to the hill to the south.
Proceed southward by climbing over the orange and yellow coral platforms.
Use the hook to climb onto the top of the hill from the orange and yellow coral platforms.
Bydefeating the electrically damaging green lobsterhere, you’re able to obtain this stowaway.
Used Bandage
(4 RES Required)+15% Healing Effectiveness.
The Sands Between - Expired Knoll
Go south and pass through the lifebuoy.
After passing through it, head east.
In this area, you’ll see a hook ahead.
Use the hook to cross over, thenactivate the robot crabwith the Eelectrocute adaptability.
A panel with blue hooks will appear in front of you.
Cross over using the hooks.
Jump to the ledge with pistol shrimps to the east.
Small Battery+
(40 MSG Required)Moderate chance to electrocute enemies on hit.
Start where the previous stowaway was.
Head east and use the hook to cross over to the opposite ledge.
Once there,defeat the electrically damaging green lobsterto obtain this stowaway.
(21 ATK Required)Attacks deal +20% Balance damage.
(To obtain this stowaway, you need todefeat Grovekeeper Topodaand learn the Mantis Punch adaptation.)
Head south andpass through the lifebuoy.After passing through, head west.
You will see an Umami Cube.
Small Battery
(25 MSG Required)Small chance to electrocute enemies on hit.
Head northwest from where the previous stowaway was.
(To acquire this stowaway, you need todefeat Grovekeeper Topodato learn the Mantis Punch adaptability from him.)
Head southeastfrom the Moon Snail Shell.
You willsee an Umami Cube among the grass.Break it with the Mantis Punch and you will find this stowaway.
Puffer Quill
+5 ATK, -20 DEF.
Expired Grove - Grove Entrance
Proceed eastward andcross the gunk river.When you reach the red plant, continue northeast.
Here, you will come to anarea with milk cartons.Move towards the northern part of this area.
As you go sufficiently north, you willsee stone columns with spongeson them below the cliff.
Reach the stone columnwith a brown glass bottle and a Soda Canshell on it.
You will find this stowaway on top of it.
To obtain this stowaway, you should probably defeat the area’s main boss,theDiseased Lichenthrope.
Contact Lens
Reveals enemy health bars.
Expired Grove - Rainbow River
Proceed northwest andcross the bridge.
When you reach the end of the bridge, turn north.
You will see a hook ahead.Stand under the hookand turn south.
Above you, you’llsee a long red fishnet.Use the two hooks to the south to reach that fishnet.
Once you climb to the top of the platform, proceed west and pass through the horizontal milk carton.
Move across the cartons andat the end of the platform, you will see another red fishnet.
Lumpsucker
(20 VIT Required)-50% Affliction Buildup from pollutants.
You will see sugar canes acting as direct supports to the platforms under the cliff.
Move towards thestone with the third sugar cane, which is the one furthest to your left.
Climb onto the small stone protrusion to the right of this sugar cane.
You willsee two hooksto the south.
Use them to reach the platforms to the south.
When you land next to the brown milk carton, continue moving southward.
You will find this stowawayinside the blue milk carton.
Sharktooth
(22 ATK Required)+20% Charged Attack Damage.
Proceed westward and jump over the bottles to cross over.
Climb onto the blue fishnet and cross over.
Use the hook in the north of this area toreach the oil drum.
Climb onto the red fishnet, and turn left.
Proceed over the orange coral andjump onto the pink coralusing the sponge to the north.
Move south and cross over using the hook.
Proceed east over the yellow coral.
Jump from the sponge ahead, andgrab onto the yellow fishnet.Move to the right and reach the red fishnet.
Climb onto another red fishnet above.
You willsee a pizza boxthere, and you should probably jump to the hill where it is.
You will find the stowaway on top of this hill.
Cotton Ball
Decreases footstep sounds.
Cross over the bottles to the southwest.Keep the cliff on your leftand continue heading southwest.
Earthworm
(31 ATK Required)Spearfishing larger enemies can be done more easily.
it’s crucial that you go to the onefurther away from the two piersyou see on the right.
Reach the end of the pier.
Phytoplankton+
(43 MSG Required)Consuming a Heartkelp Pod regenerates a moderate amount of Umami.
Pass through the pink milk carton.
Continue northwest and there will be asmall milk carton in the middle of this area.Approach it.
Turn north and you willsee a red fishnet on the cliff.Move towards it and grab onto it.
When youturn around and look up, you will see a blue fishnet.
Enter it and climb up with the sponge.
Proceed to the milk carton with windows on all four sides to the west.
Turn southeast and jump up from the sponge inside the pink milk carton.
Inside it, you will find this stowaway.
Wad of Gum
(7 RES Required)Slows enemies that hit you.
Expired Grove - Topoda’s Garden
Proceed north and follow the path.
After advancing enough, you willsee a hook abovein the northeast direction.
Inside the pit, in the middle, the yellow glowbelow the stalactitebelongs to this stowaway.
Shark Tooth+
(45 ATK Required)+40% Charged Attack Damage.
Flotsam Vale - Upper Swamp
First, it’s crucial that you head south from the fast travel point.
Fruit Sticker
Increases microplastics rewards.
Sea Cucumber
+3 VIT, +3 RES, +3 ATK, +3 MSG.
Zooplankton
(26 MSG Required)Taking damage regenerates a little Umami.
Climb onto thepile of trash with yellow shopping cartson the west side of this area.
Climb onto thepile of trash with yellow shopping cartson the west side of this area.
Descend using the air current to the east.
Climb onto the stone pillar with thebottom part of the red fishing netto the northeast of the fishing rod.
Jump into the water from the east side.
In the water, you will see a crackbetween a battery and a nailin the northeast direction.
By collecting the blue glow there, you’re free to obtain this stowaway.
Cockle
(6 RES Required)+20% Hammer Damage.
Jump onto thestone pillar with the Lil Red Cup shellon it.
Jump to the stone area to the southwest andclimb up the yellow fishing net.Proceed northeast.
After going a bit north, turn east and you willsee white patterned stoneswith a crab holding a corkscrew.
Defeat the crab and you could collect the stowaway behind it.
Go to the end of the long wooden platform.
Lil Isopod
Increases move speed while blocking.
You willsee a white ripple, use the Spearfishing ability to obtain this stowaway.
Rubber Band
Become immune to electric attacks.
Flotsam Vale - Sorting Chamber
Wait for the magnetto arrive.
Attach to the magnet and descend to its final stop.
From there, jump onto the continuation of the stairs.
When you reach the middle of the path with metal plates, jump down to the south.
You will find this stowawaynext to the crabs with two box shells.
Sinker++
(50 ATK Required)Attacks deal +50% Balance damage.
Go to where the previous stowaway was.
Before falling all the way down,grab onto the green fishing netoutside the wall.
Proceed to the right.
Attach to the magnet above you, and you will see a room inside the building.
Enter there andopen the oyster insideto obtain this stowaway.
Turtle Shell Shard
+10 RES, Increases Shell Weight.
Cross over the cable and proceed east.
Fromnext to the sea urchin, jump down to the area below with electrical cables located to the southeast.
Fruit Sticker+
Greatly increases microplastics rewards.
Here, two green lobsters are causing electrical damage.
If youdefeat the one on the left, this stowaway will be yours.
Rusty Nail+
(10 RES Required)+10 ATK, -8 MSG.
Use the rotating magnet in a circular shape to reach the height where its base is located.
Lanternfish
(30 VIT Required)A bioluminescent friend to light your way.
Go south and reach a red glowstick, then proceed west to reach a yellow glowstick.
From there, head northwest to reach another pink glowstick.
Continue west andreach a stone with another pink glowstick.
Cross over using the stone columns to your southwest.Take the cliff to your leftand head southeast.
You’ll find this stowaway inside the ruined structure there.
Lamprey+
(46 ATK Required)+7% Health Drain.
Go to the edge of the cliff where you obtained the previous stowaway.
Cross overusing the hooks located northwest.Traverse over the stone columns and look west.
Swim across, fire up the oyster, and obtain the stowaway.
Salp+
(38 MSG Required)-50% Umami Regeneration.
Proceed southeast and head towards thearea with two pink glowsticks.Move south and cross over the stone pillars.
When the path splits, take the left path, and use the hooks to cross over.
Continue through the corridor until you reach the Abyssal Plains.
Zooplankton+
(26 MSG Required)Taking damage regenerates a moderate amount of Umami.
The Unfathom - Luminous Respite
Cross over with the hooks to the north of the fast travel point.
You’ll see an oyster nestled among thepale green plants in the centerof this area.
Open it to obtain this stowaway.
Whelk+
(7 RES Required)+30% Shell Spell damage.
Next to the oyster where you obtained the previous stowaway,look southwest.
You’ll see the blue shimmer of the stowaway.
Climb up onto the rock where it’s located and collect it.
Barnacle++
+20 DEF, -10 RES.
The Old Ocean - Bleached Glade
(35 MSG Required)+67% Umami Regeneration from attacking.
The Old Ocean - City Gates
Head north.
Move towards the gate in the northwest and,before entering the gate, turn north and climb up.
Go east from this elevated area and you will see the stowaway at theend of the long stone platform.
Sea Star++
+9 VIT.
Start from where you found the previous stowaway.
Jump to it and go northwest.
The stowaway you are looking for will be inside an oyster there.
Used Bandage+
(10 RES Required)+25% Healing Effectiveness.
The Old Ocean - Lookout Tower
Cross the toilet paper bridge and head south.
Mussel++
+6 ATK, +2 VIT.
Start from where you found the previous stowaway.
Head backup to the blue fishnetto your north.
Cockle+
(12 RES Required)+30% Hammer Damage.
Turn east and jump onto thefloating stone with the blue fishnet, then reach the opposite structure.
Use the stairs in the structure to climb to the top.
Head to thewest side where the scissors are located,and descend the stairs.
Stop at the spot with the tennis ball shell in front, and enter the passage on your left.
Inside, you will find this stowaway.
Whelk++
(12 RES Required)+45% Shell Spell damage.
Go to the spot with the tennis ball shell that you saw while retrieving the previous stowaway.