These include illusionary walls, challenging enemies, mustached giant lanterns, and suspicious-looking leaves on the ground.
We rank all the daruma’s from Bo: Path Of The Teal Lotus.
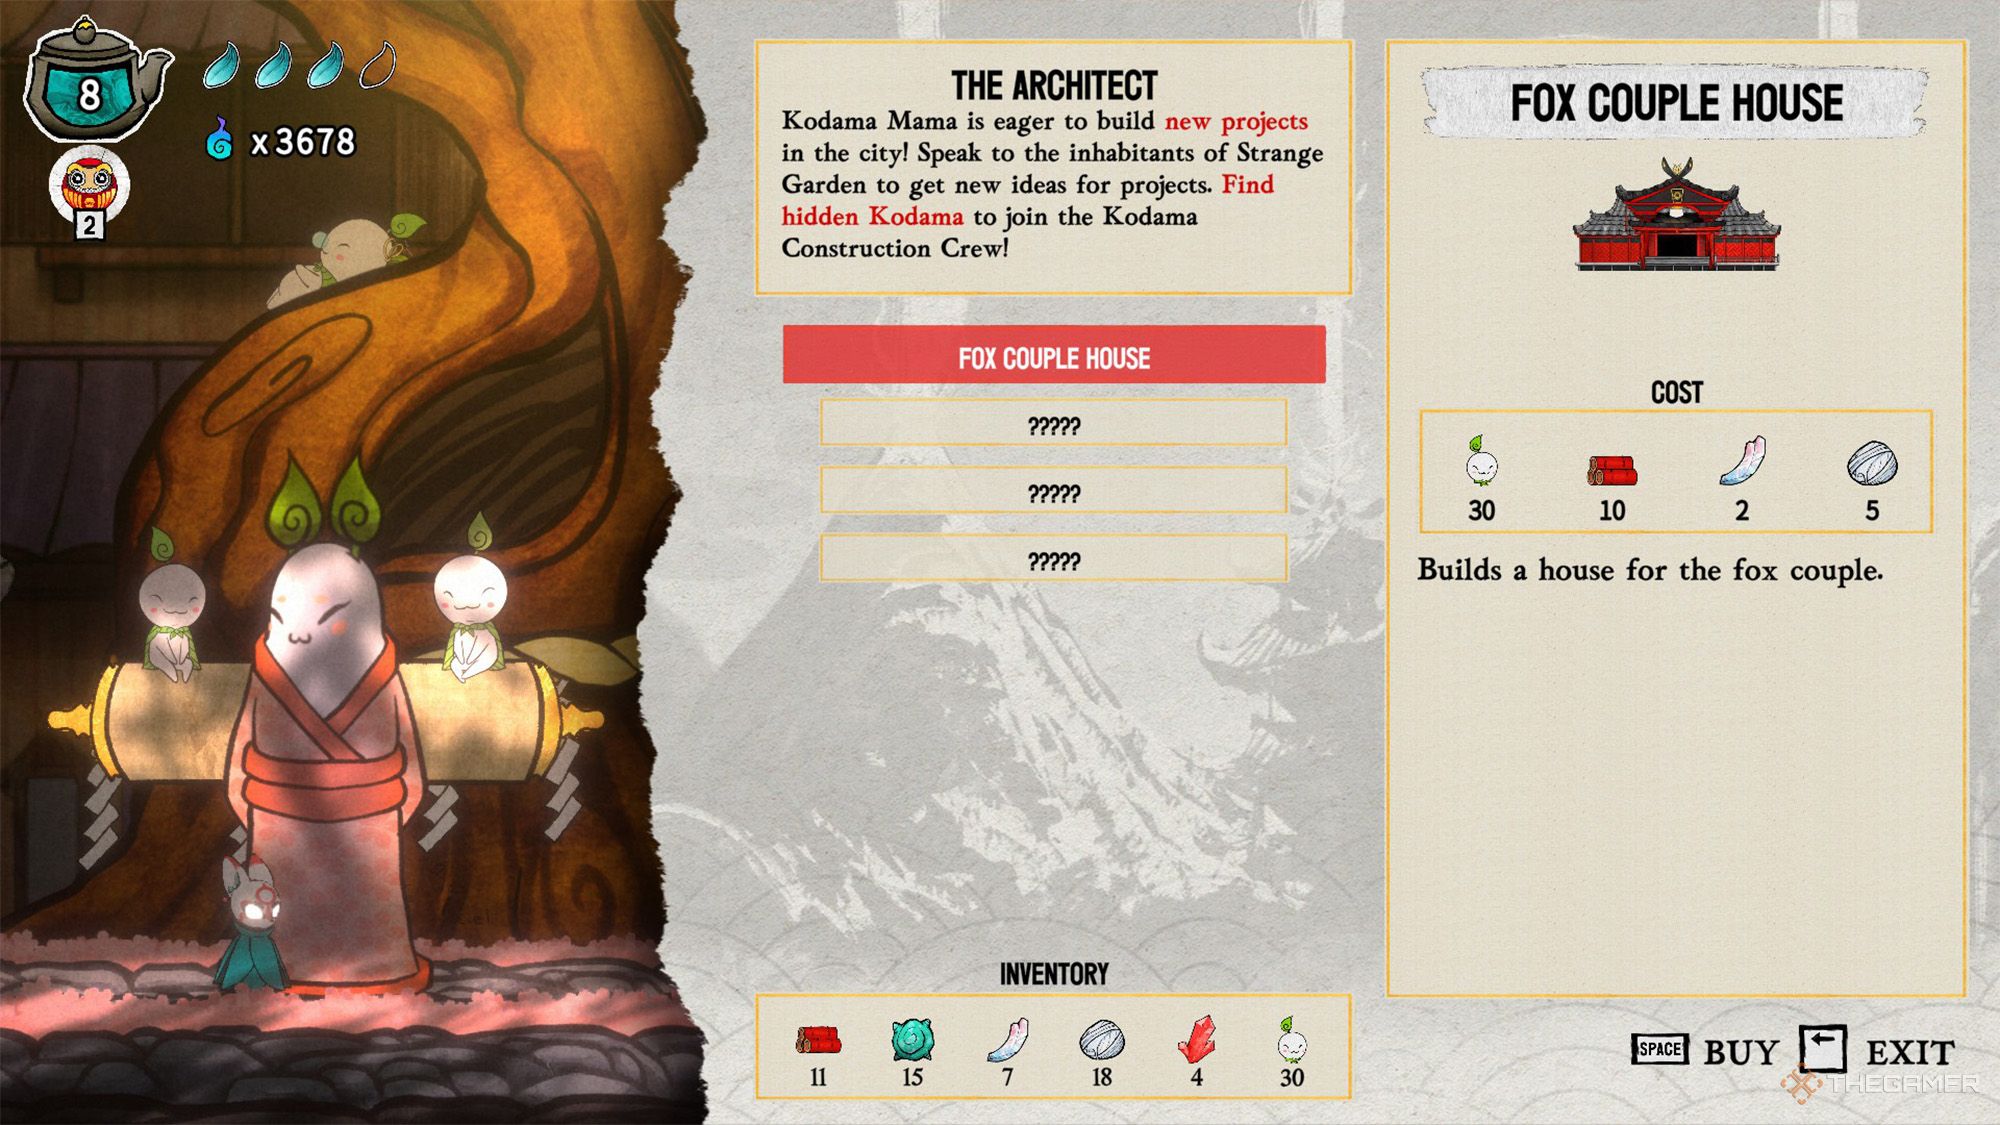
If you’re familiar with Japanese folklore, you’ll know that these are small spirits living in trees.

How To Use Kodamas
Kodamas on their own are not very useful.
While constructing these buildings, she will also request additional materials alongside the Kodamas.
Additionally, when you find all 32 Kodamas, you will unlock the Kodama Mama achievement.

You willsee a Lantern Spirit to the left of the first save pointyou come across.
Jump into the air and hit it.
Then, use them again tojump to the area with the burning hut on the right.
Continue straight to the left, and beyond the red bamboo corridor, you will see the Kodama.
To reach it, Dash towards the Lantern and then perform another Dash to reach the Kodama.
Be careful of the red bug-like enemies that have set traps on the ground.

it’s possible for you to trigger the traps to make the rolling enemy destroy them.
Go to the right in this corridor, and you will find the Kodama above.
Get onto the platform to theupper left of the lowest mushroom.

The green enemy will shoot a blue projectile at you.
Go to theleft of the large room with a waterfalland mushroom statue on your map.
Go to theright of the large room with a waterfalland mushroom statue on your map.

After passing through it, continue to the right.
Leave this room and go left again.
You may need to practice this several times to get it right.
Destroy it, and you will find the Kodama.
Reach Minori’s location and head left.
Go left and climb onto the large sprouts leaf.
As you move left, youll see two wells.
On theleft side of these wells, youll find a Kodamaon a ledge.
Start from the previous Save Shrine.
If youcontinue straight left using the lanternsfrom this area, you will find another Save Shrine.
Afterstanding on the grassy area with spikes on both sides, go left and youllsee four stacked wolf enemies.
On the ledge above and to theright of their location,youll find the Kodama.
you’re free to use your Pogo ability on their projectiles to reach and collect this Kodama.
Start from the Fast Travel point in Midori Forest.
You will find this Kodamaon the long stone platform.
Start from the Fast Travel point in Megumi Mountain.Move rightand jump onto the first stone platform in the air.
From there,turn left and pass through the ethereal barrierusing Tsuki Dash.
Use the lantern to jump through the air and reach the section ahead.
Then,move left and cross through the spikesto the other side.
Once you reach this hidden area, you will see the Kodama.
You will be teleported to another wooden tub; while standing on it, use Mochi Mallet again.
From there,turn left and pass through the ethereal barrierusing Tsuki Dash.
Use the red lantern on the left to reach the area at the top left.
Below you, you’ll see a death pit with moving spiked vines.
You will see the Kodama to theleft of the wooden tub you teleported to.
Sixth Kodama Location
Enter the red-colored area below Kitsune Burrows on your map.
Seventh Kodama Location
Start at the fast travel point in Kitsune Burrows and head left.
Once there, go right.
Continue right andreach the area with the pink-glowing wooden tub.Teleport repeatedly to gain momentum and move upward.
This will allow you to destroy the rock above it.
In the next room, you willsee two moving traps.Break the groundwhere the traps are located with Mochi Mallet.
This will reveal the Kodama.
After encountering this enemy,proceed right and pass the vertical ice crystal traps.
Go right, pass the Save Shrine and the battle room.
On your left, you’llsee another spinning wheel obstacle; you gotta get to the left of it.
Continue left, where you’ll encounter more spinning and ice-tipped obstacles.
