This zone features some of MWZ’s most sought-after schematics and endgame items.
Complete the final mission in Act 2 with this in-depth quest walkthrough.
But before you venture into the Dark Aether, you will want to come prepared.

Preparing For The Mission
The Bad Signal story mission isimmediately available to all playersupon booting up MWZ.
You don’t need to complete any previous Acts to start this mission.
It is possible to solo this mission, but it’s extremely difficult; come prepared.

This mission contains aworm boss fightthat isnotoptional, so be sure to plan your loadout accordingly.
We recommend the following:
The zombies in this mission are Medium Threat (T2).
Weapons should have T2 Pack-A-Punch and the highest rarity possible, preferably Epic (purple).

Gear
Weapons
(Pick 2)
Perks
Learn how to unlock every MWZ weapon camo with this in-depth guide.
This is where you’ll start the Bad Signal mission.
Any items you have will carry over to the Bad Signal mission, so feel free to prepare.
Pack-A-Punch your weapons, get every perk, and stock up on Self-Revive Kits.
Beak The Seals
You have 30 minutes to complete the mission once it starts.
Should you run out of ammo,an ammo cache is stationed near the shore.Grab some ammo and retreat.

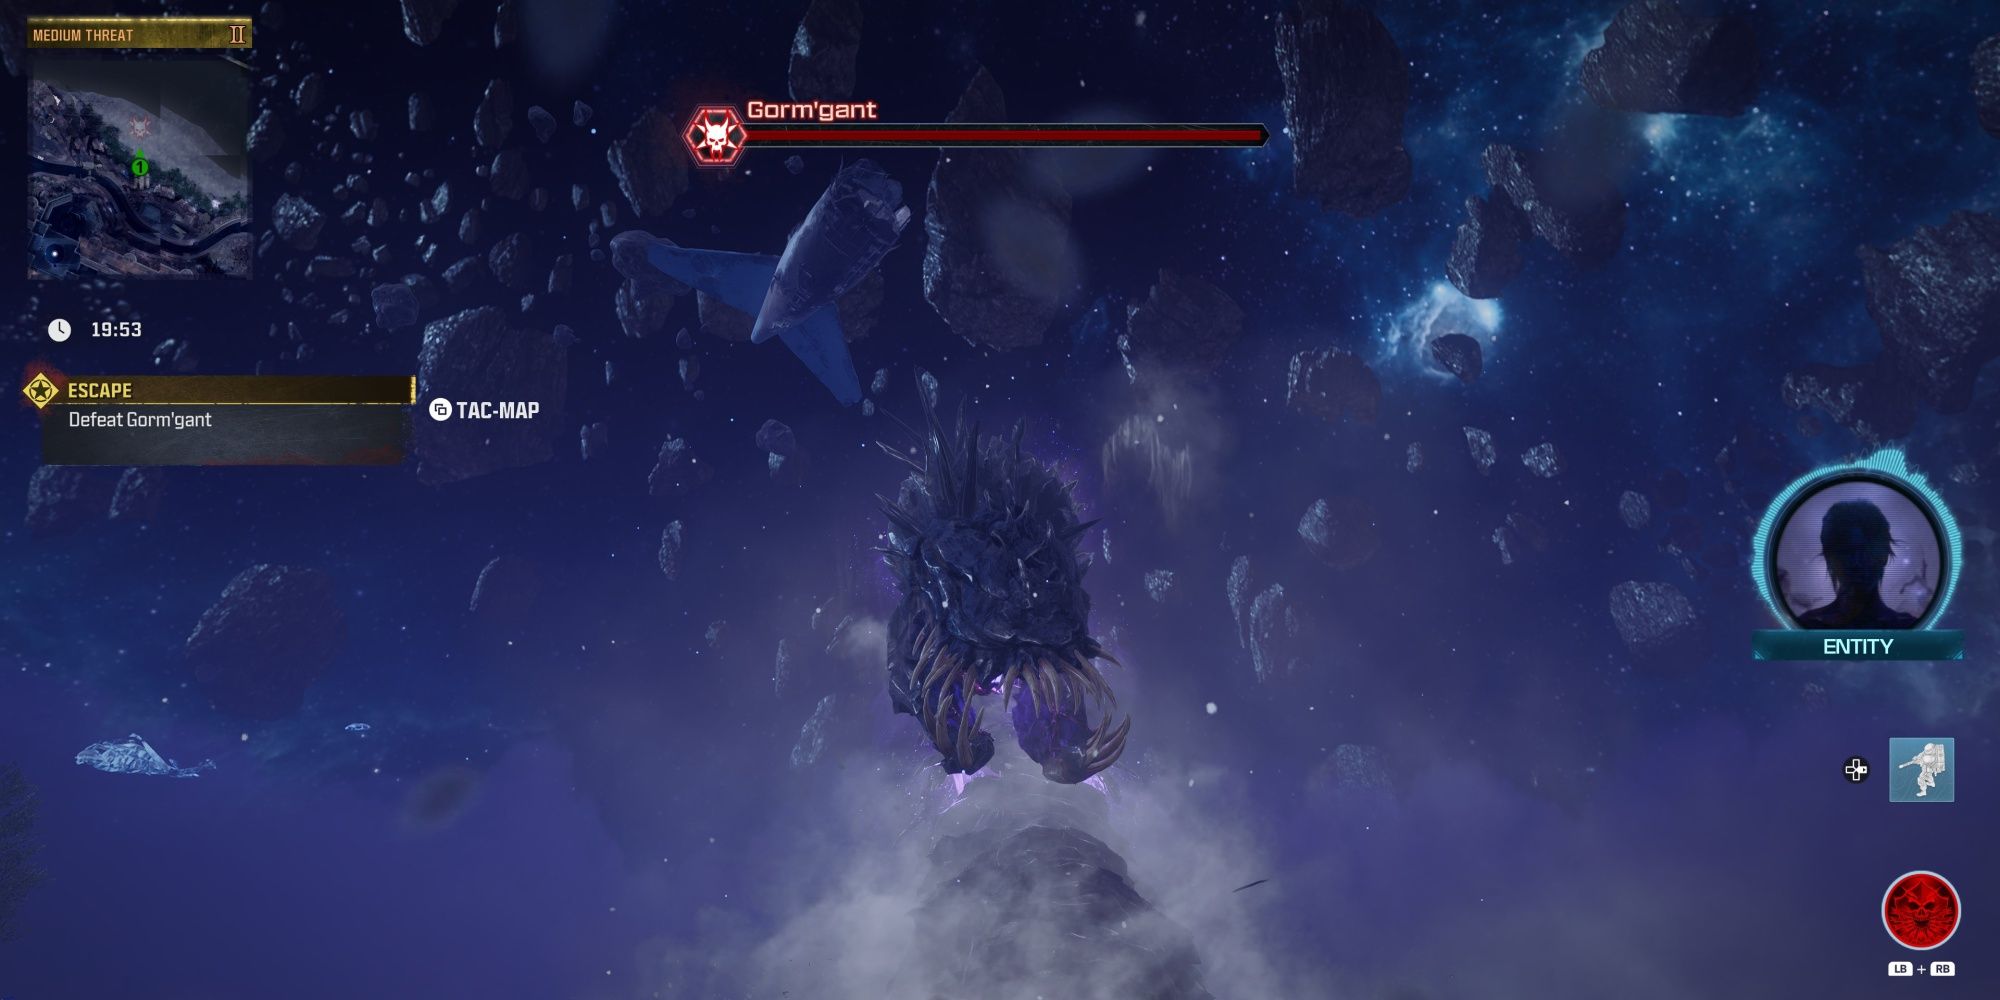
Burrow Bug
Gorm’gant can sometimes get stuck while in their burrow attack animation, refusing to resurface.
You must damage the worm with an explosive weapon to fix this issue.
As with Orcus,Gorm’gant’sweakpoints are its glowing scaleson each side of its body.

Shooting them will deal critical damage, and dealing sustained damage will cause them to explode.
Continue laying into the worm’s weakpoints until you break all of its scales.
Once the worm dies, enter the Dark Aether portal to finish the mission.
Locate all Essence of Aether canisters with this MWZ quest guide.