Complete any of these challenges, and you’ll increase the drop chance of theEuphonyraid Exotic.
More importantly, you’ll make progress towards the Iconoclast raid title.
From raid mechanics to red border chests, this Salvation’s Edge raid guide has you covered.
Here is a complete guide to every raid challenge available in Salvation’s Edge.
We’ve updated this guide to include a strategy for completing the Coordinated Efforts challenge.
The Varied Geometry section was also rewritten to better explain the rotation order for solo players.

Scenic Route
Encounter
Substratum
Challenge
The team that gets their Overload Champion first mustnotkill it.
The team that gets their Overload Champion secondmustkill it.
Beyond that, the encounter plays out like normal.
Once the Overload Champion dies, both teams converge to the middle room and eliminate the Tormentor.
Lock the conductors, kill the Subjugator, dunk, and repeat.
At Capacity
Dissipation
You may only deposit x3 Resonance into the Resonance box.
Locking the conductor doesnotrequire max Resonance, just the box.
Repeat as needed until the encounter ends.
Changing Tactics
Resonance players must swap wings while charging conductors.
All three sides spawn the same symbols.
it’s possible for you to rotate counter-clockwise as well.
Just see to it everyone’s going in the same direction.
Get your hands on a burst-fire Witherhoard, a Solar Rocket Sidearm, and much more.
Balanced Diet
Repository
You cannot grab the same symbol twice in a row.
If done this way, little communication is needed.
see to it your conductor players grab first.
They need a specific shape to close their conductor.
Singular Torment
Only one player may kill Tormentors.
Once it drops below 10%, let the assigned player get the kill.
The rest of the encounter plays out like normal.
Varied Geometry
Verity
Each round cannot be solved with the same set of shapes.
Everything else plays out the same.
You need two squares (SS) to escape.
Trade with whoever doubled up on squares.
Ensure you’re trading the same symbol on both swaps.
You’re moving the same symbol to the same player both times.
The recipient will simultaneously give you their symbols (CC or TT in this case).

Once the first player is done, then the second and third players will swap their symbols.
Everyone should now own the correct symbols.
Solo players will then kill their Knights, grab their symbols, and escape.
It’s OK if you make a complex 3D shape in the process.
You just can’t have anyone leave with a complex 3D shape.
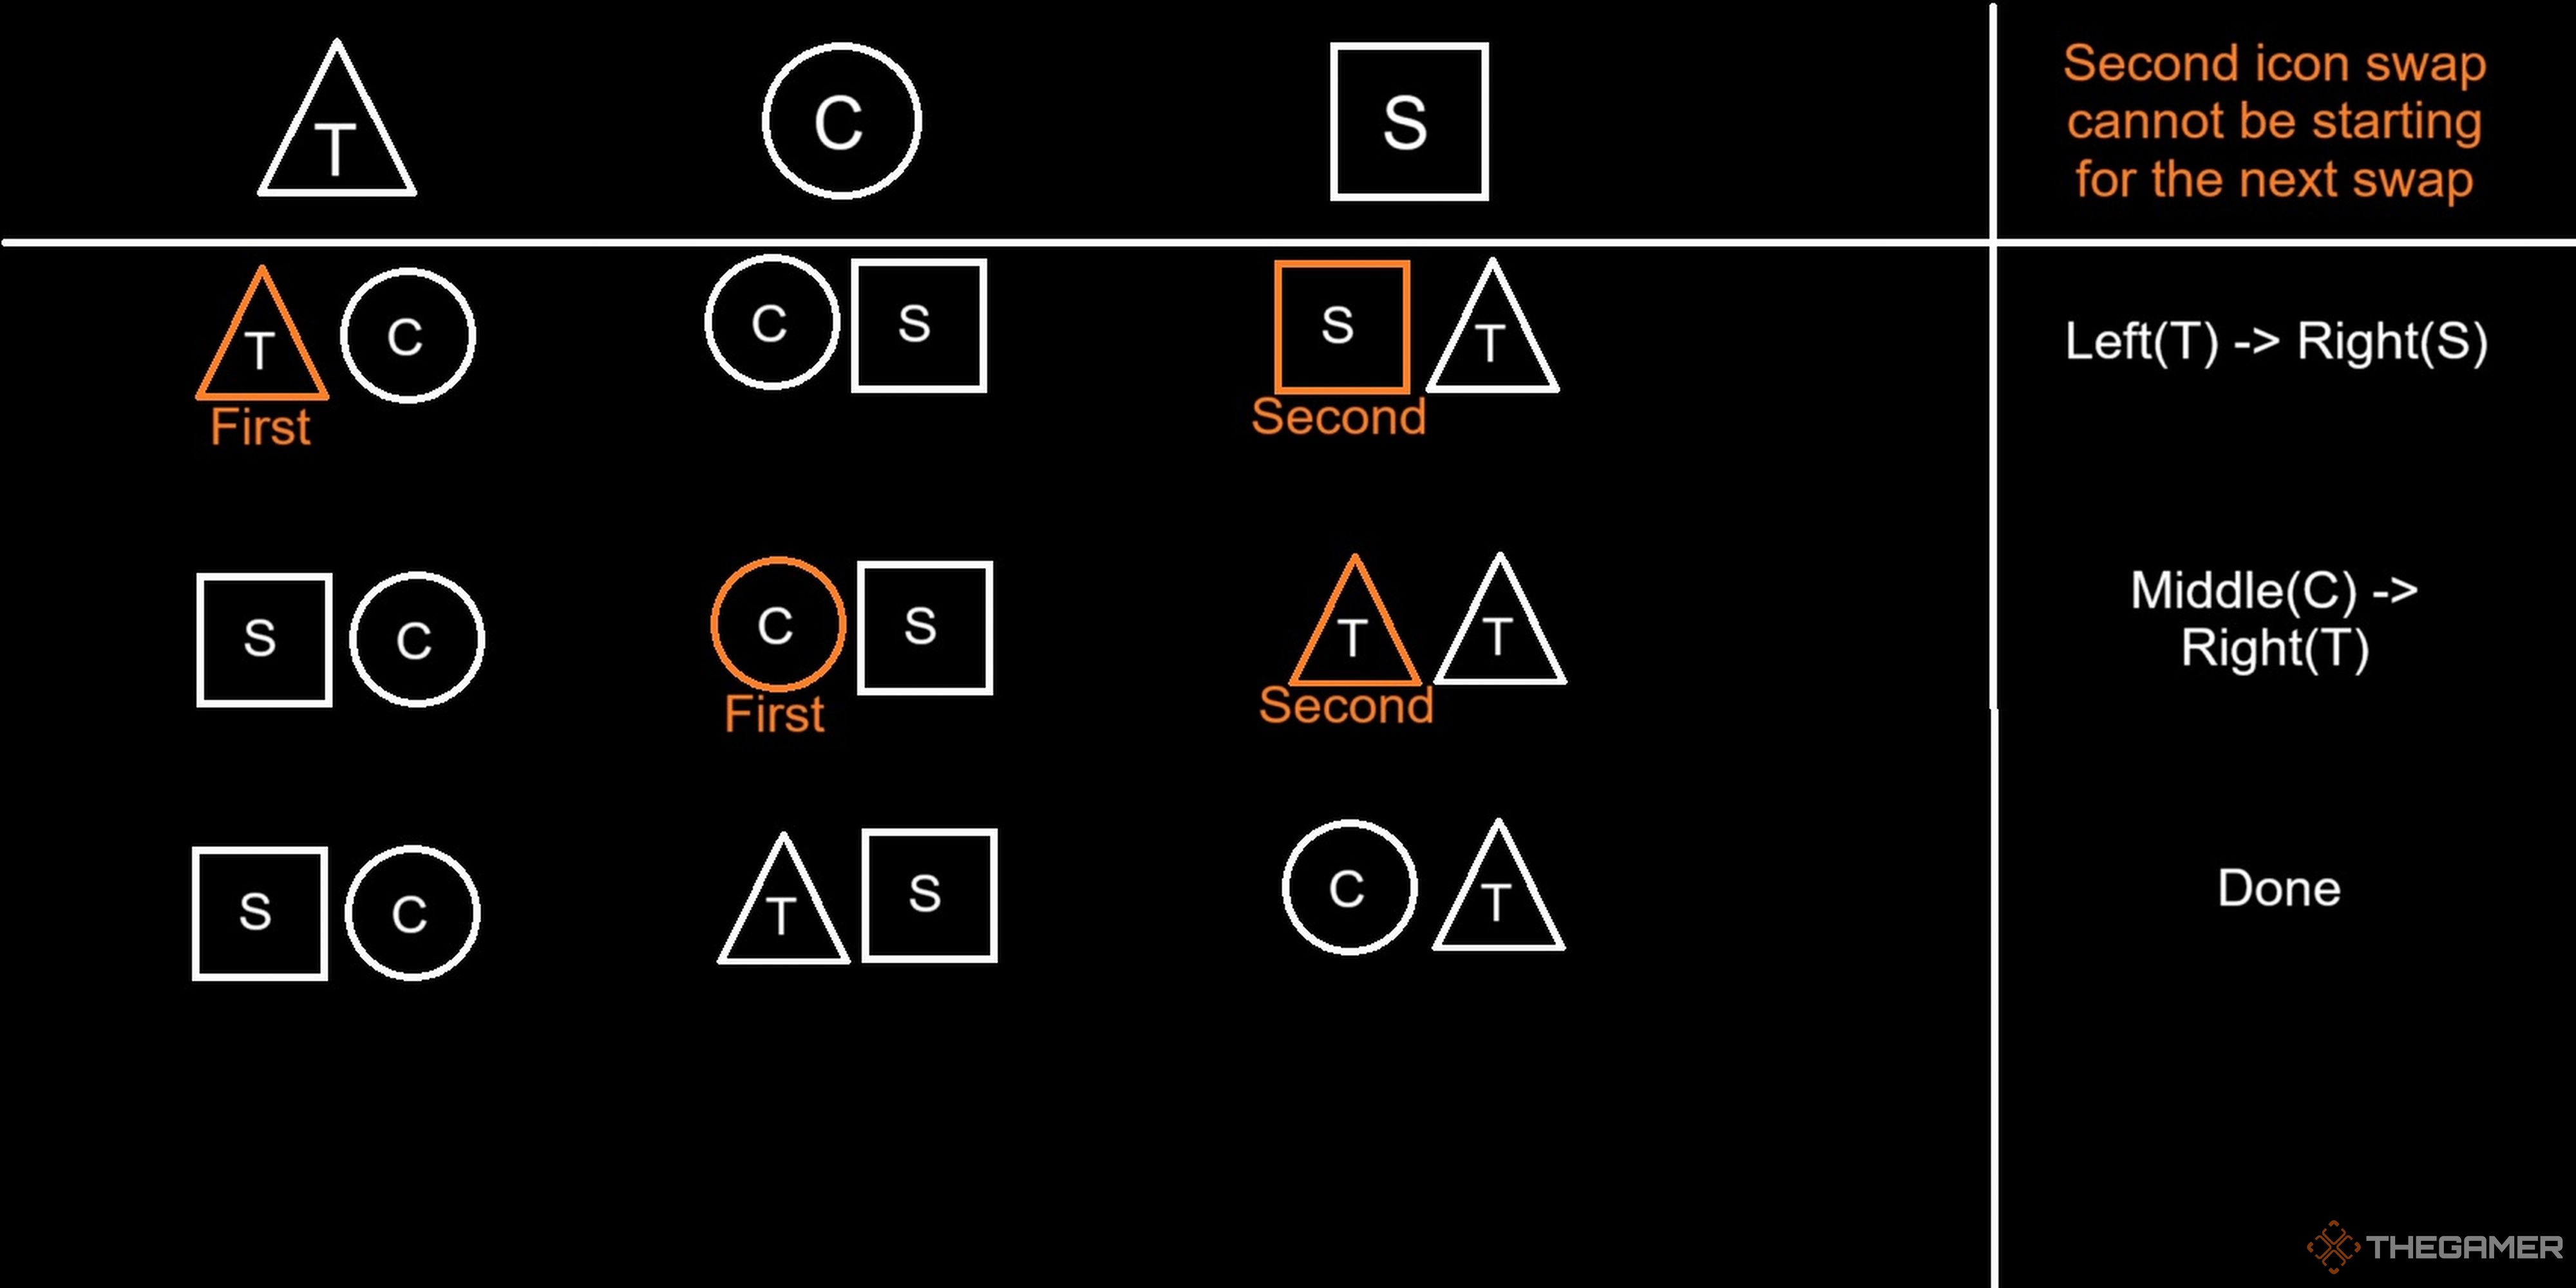
Here is an example of a potential solution for round two.
In this example, we need to create simple 3D shapes for each person to escape.
Only two swaps are needed here.
Each Guardian’s starting symbols are labeled below the statue number.

Whichever symbolstayswith the statue determines which 3D shape you’ll create (CC, SS, or TT).
You just need to coordinate every buff swap.
It goes without saying, but clear communication is a hard requirement.
you might find encounter examples below for each role.
Repeat this process until all three players deposit both their symbols.Call out when you’re doneso dissection can start.
Dissection Team Example
Do not start dissecting symbols until the other team is finished.
Surprisingly, dissection isn’t that much harder if you’re attempting to complete this Triumph.
The catch is thatwhichever statue is going to get the simple 3D shape should be grabbedsecond.
The solo players can now escape.
Creating a build in Destiny 2 can be daunting.
Here is a template to get you started.
Coordinated Efforts
Zenith
You must break all six of the Witness' Glyphs simultaneously.
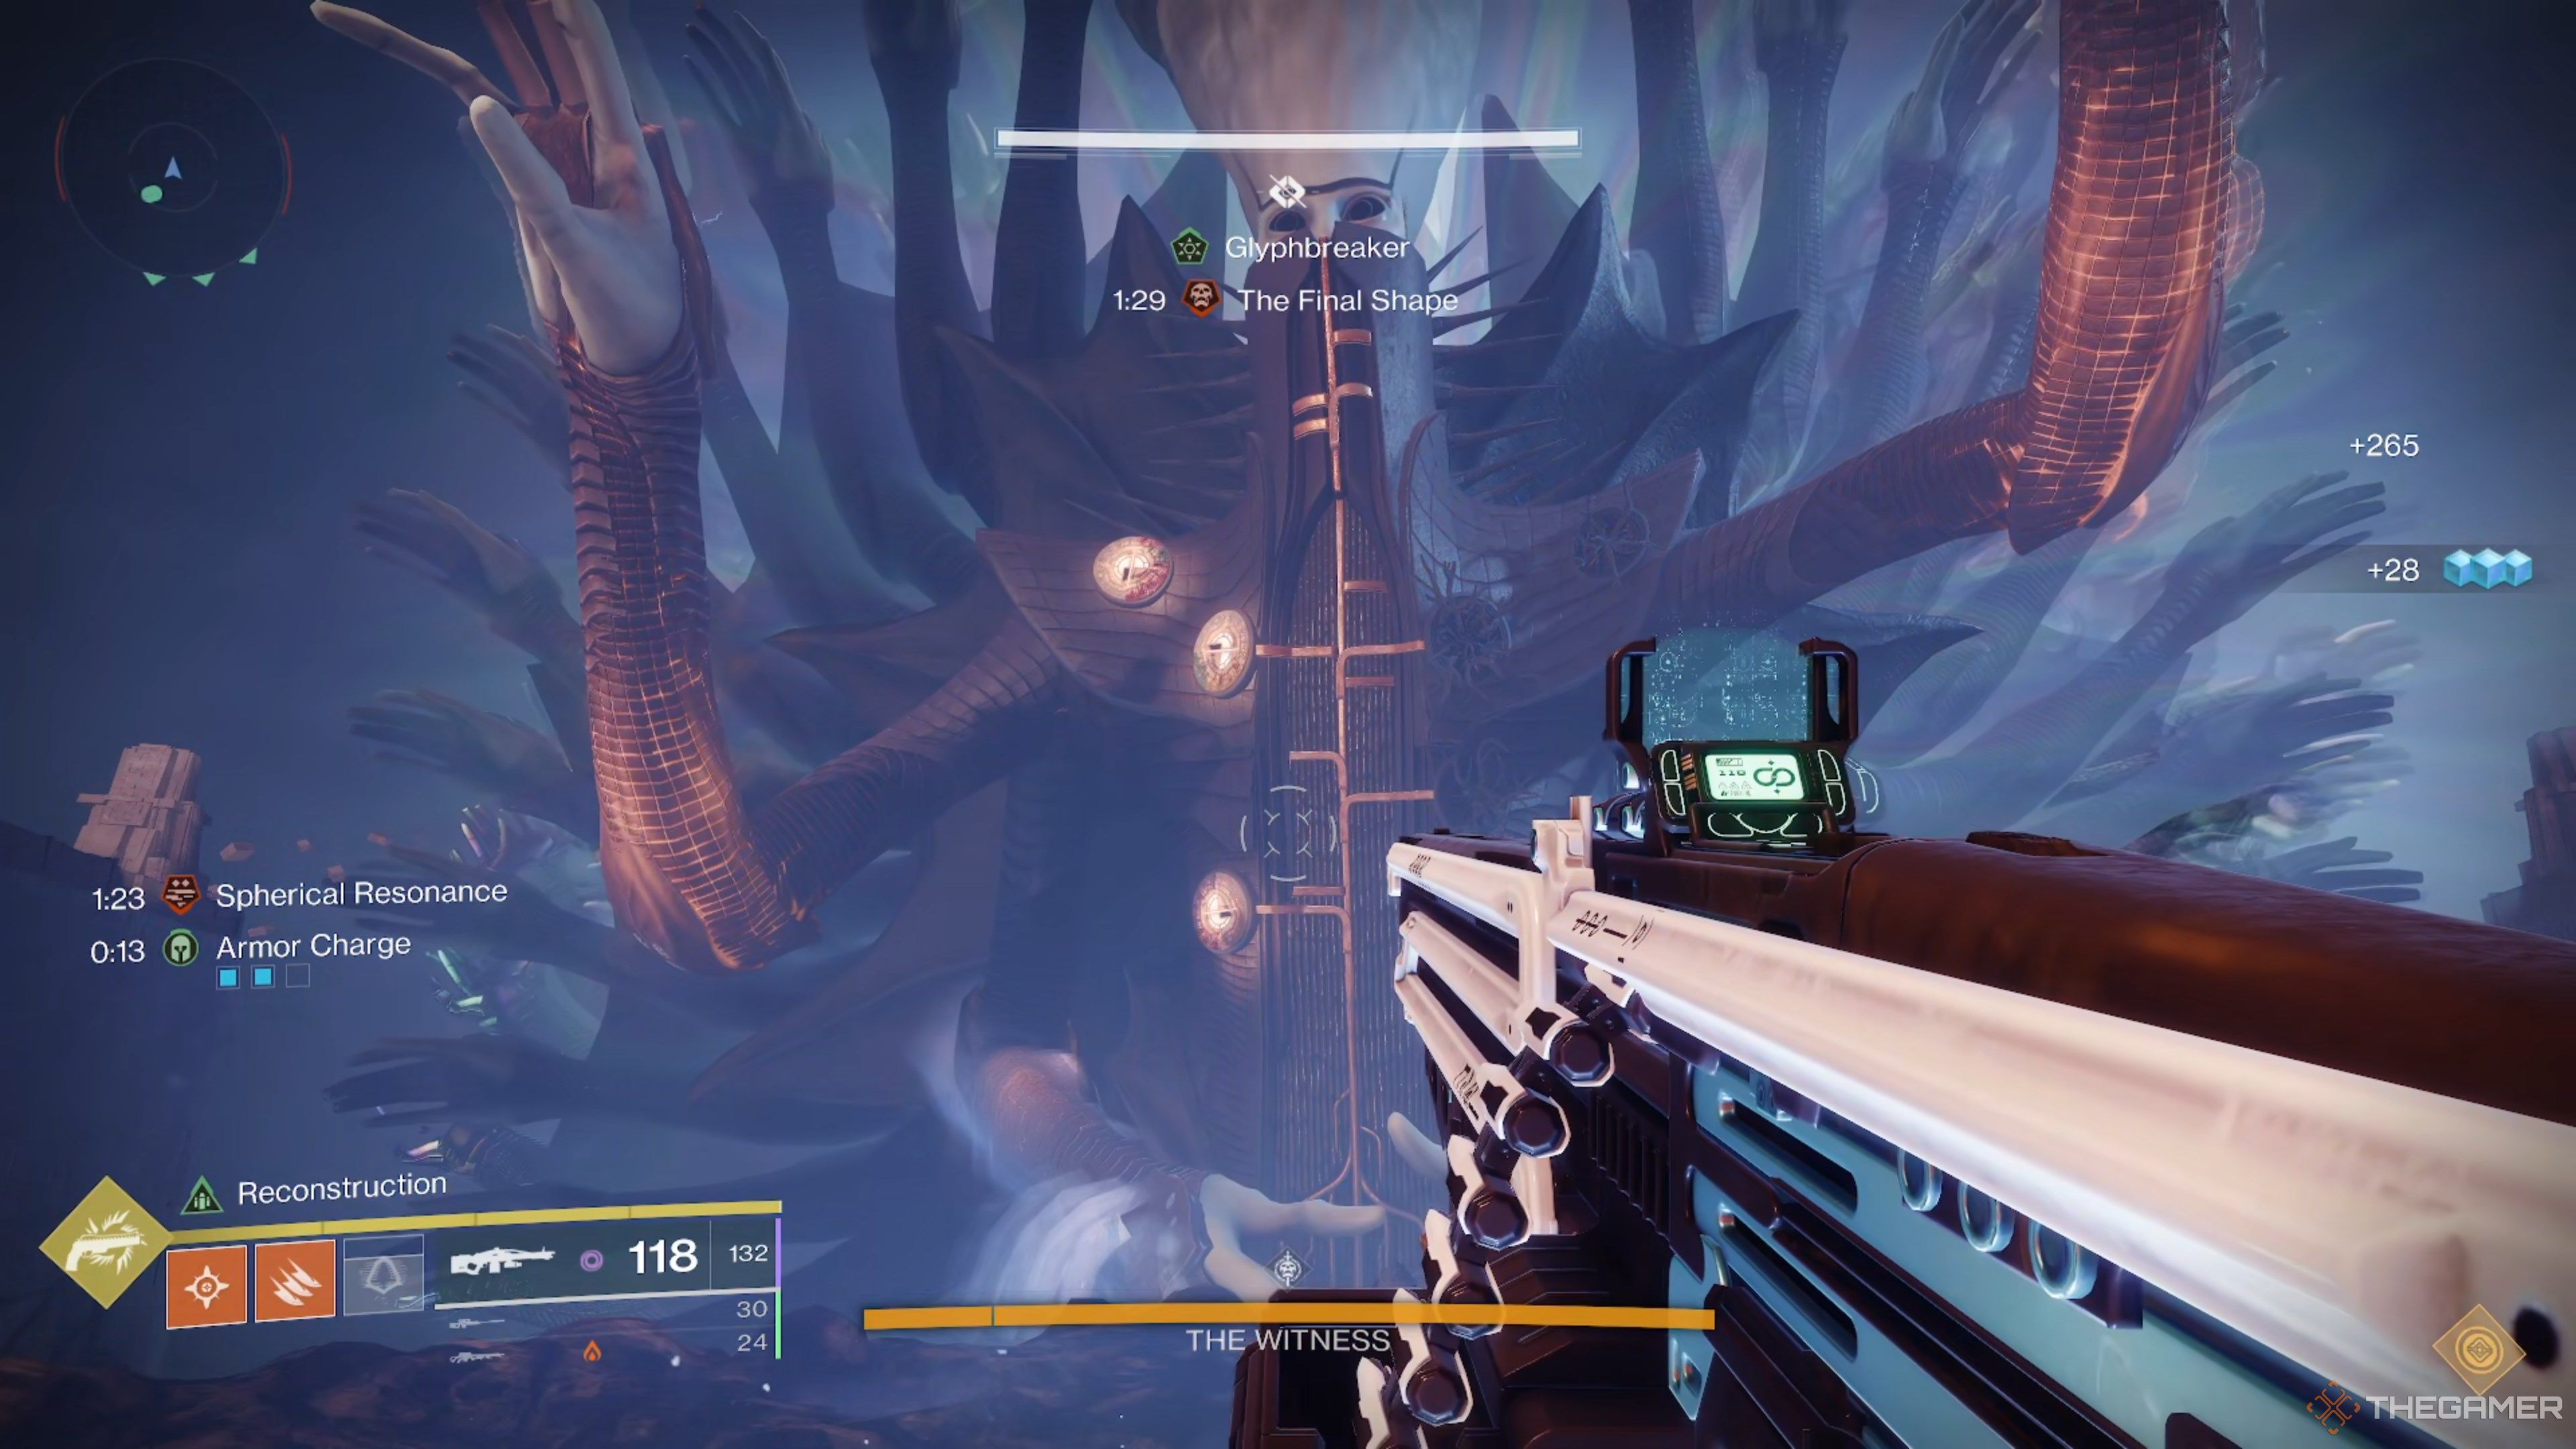
Add clear and runners will swap roles once three players get Glyphbreaker.It’s that simple.
We suggest swapping once all three runners have Glyphbreaker to make the transition as smooth as possible.
Once all six players have Glyphbreaker, head to the DPS plate and start breaking the Witness' buttons.
Each player should have a designated Glyph to shoot at.
Everything else plays out the same.
The Resonance timer can easily kill you while attempting this challenge.

venture to keep your Resonance to x2 or lower when acquiring Glyphbreaker.
This lets you grab an extra stack of Resonance to reset your 90-second timer.
Careful Calculation
You cannot exceed x2 Resonant stacks.

We recommend each limb player select a specific attack jot down they’ll counter.
Grab the correct Resonance buff, return to the limb, then break the bracelet.
The rest of the encounter plays out like normal.

Glyphbreakers should stand on the DPS plate when breaking Glyphs to cleanse their Resonance stacks.
These are the best perk combinations you could find on the Salvation’s Edge raid weapons.
