Quick Links
You may want to stop playingPalworldalone and instead experience it with your friends.
Set some time aside to collect all of these effigies.
In this case, you may want to move your server to a secondary computer.

Let’s learn in detail how to set up and move a Palworld server with this guide.
What Is A Dedicated Server?
What Makes It Different From Other Servers?

If you want to play multiplayer games in Palworld, you have some options ahead of you.
Additionally, dedicated serversoffer flexibility and the ability to be optimized.
Thanks to dedicated servers,your server will be online 24/7even if you are offline.

This allows others to join and play whenever they want.
If you are determined to set up a dedicated server, here’s where the road splits for you.
How To Set Up A Dedicated Server In Palworld?
Even if you’re unfamiliar with these topics, it’s quite simple to do.
web link
UDP Port 8211 (Default, Changeable) Be able to port forwarding by router configuration.
Storage
Recommended for faster SSD.
What you should do is drop in the server on the system you rented from the hosting company.
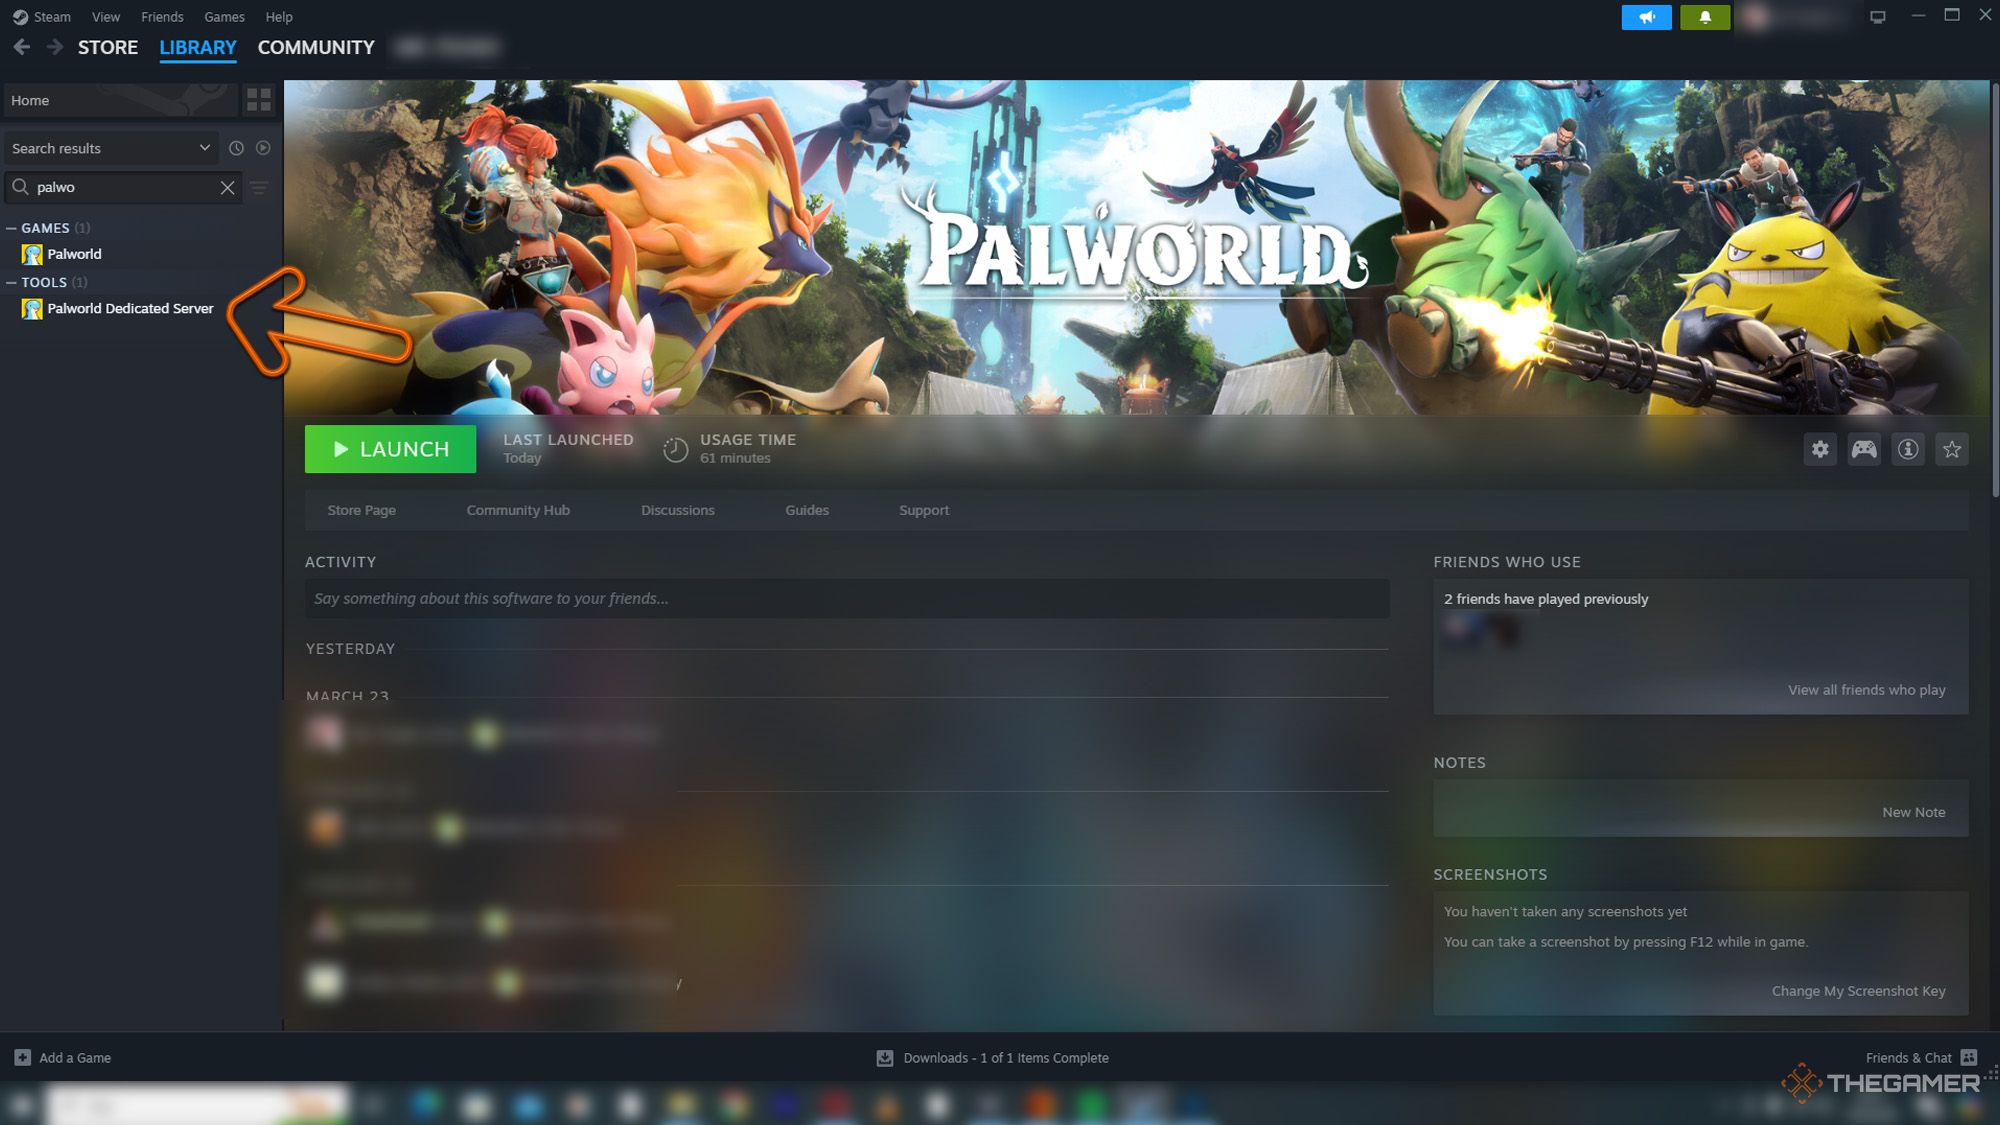
The first thing you gotta do isdownload the Palworld Dedicated Serverfrom Steam.
After downloading the Palworld Dedicated Server,choose the ‘Launch’ option.
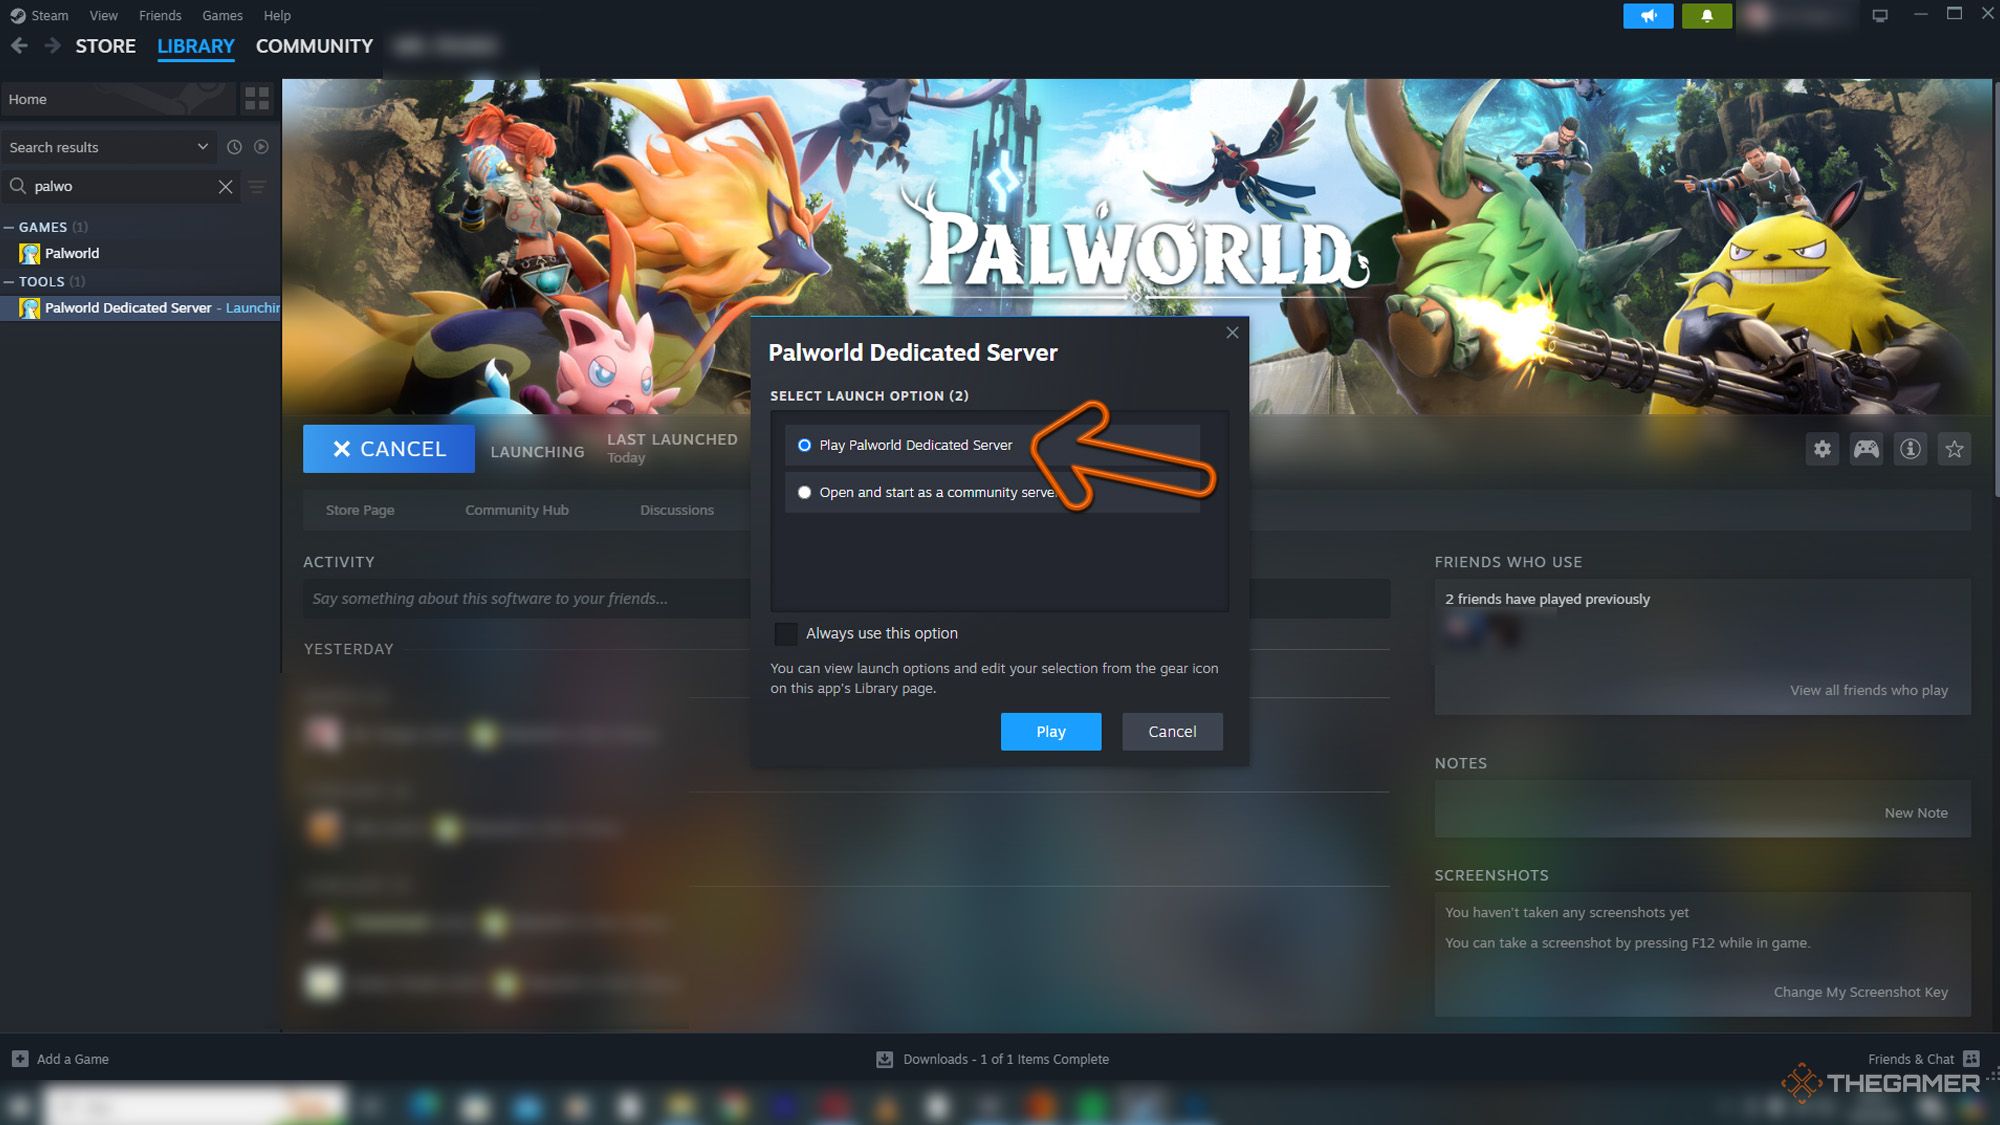
Select ‘Play Palworld Dedicated Server’ from the Steam window that appearsand then press the ‘Play’button.
Then,a CMD window will appearwith “Setting breakpad minidump AppID” written on it.
The number at the end varies for each computer as it’s assigned uniquely.
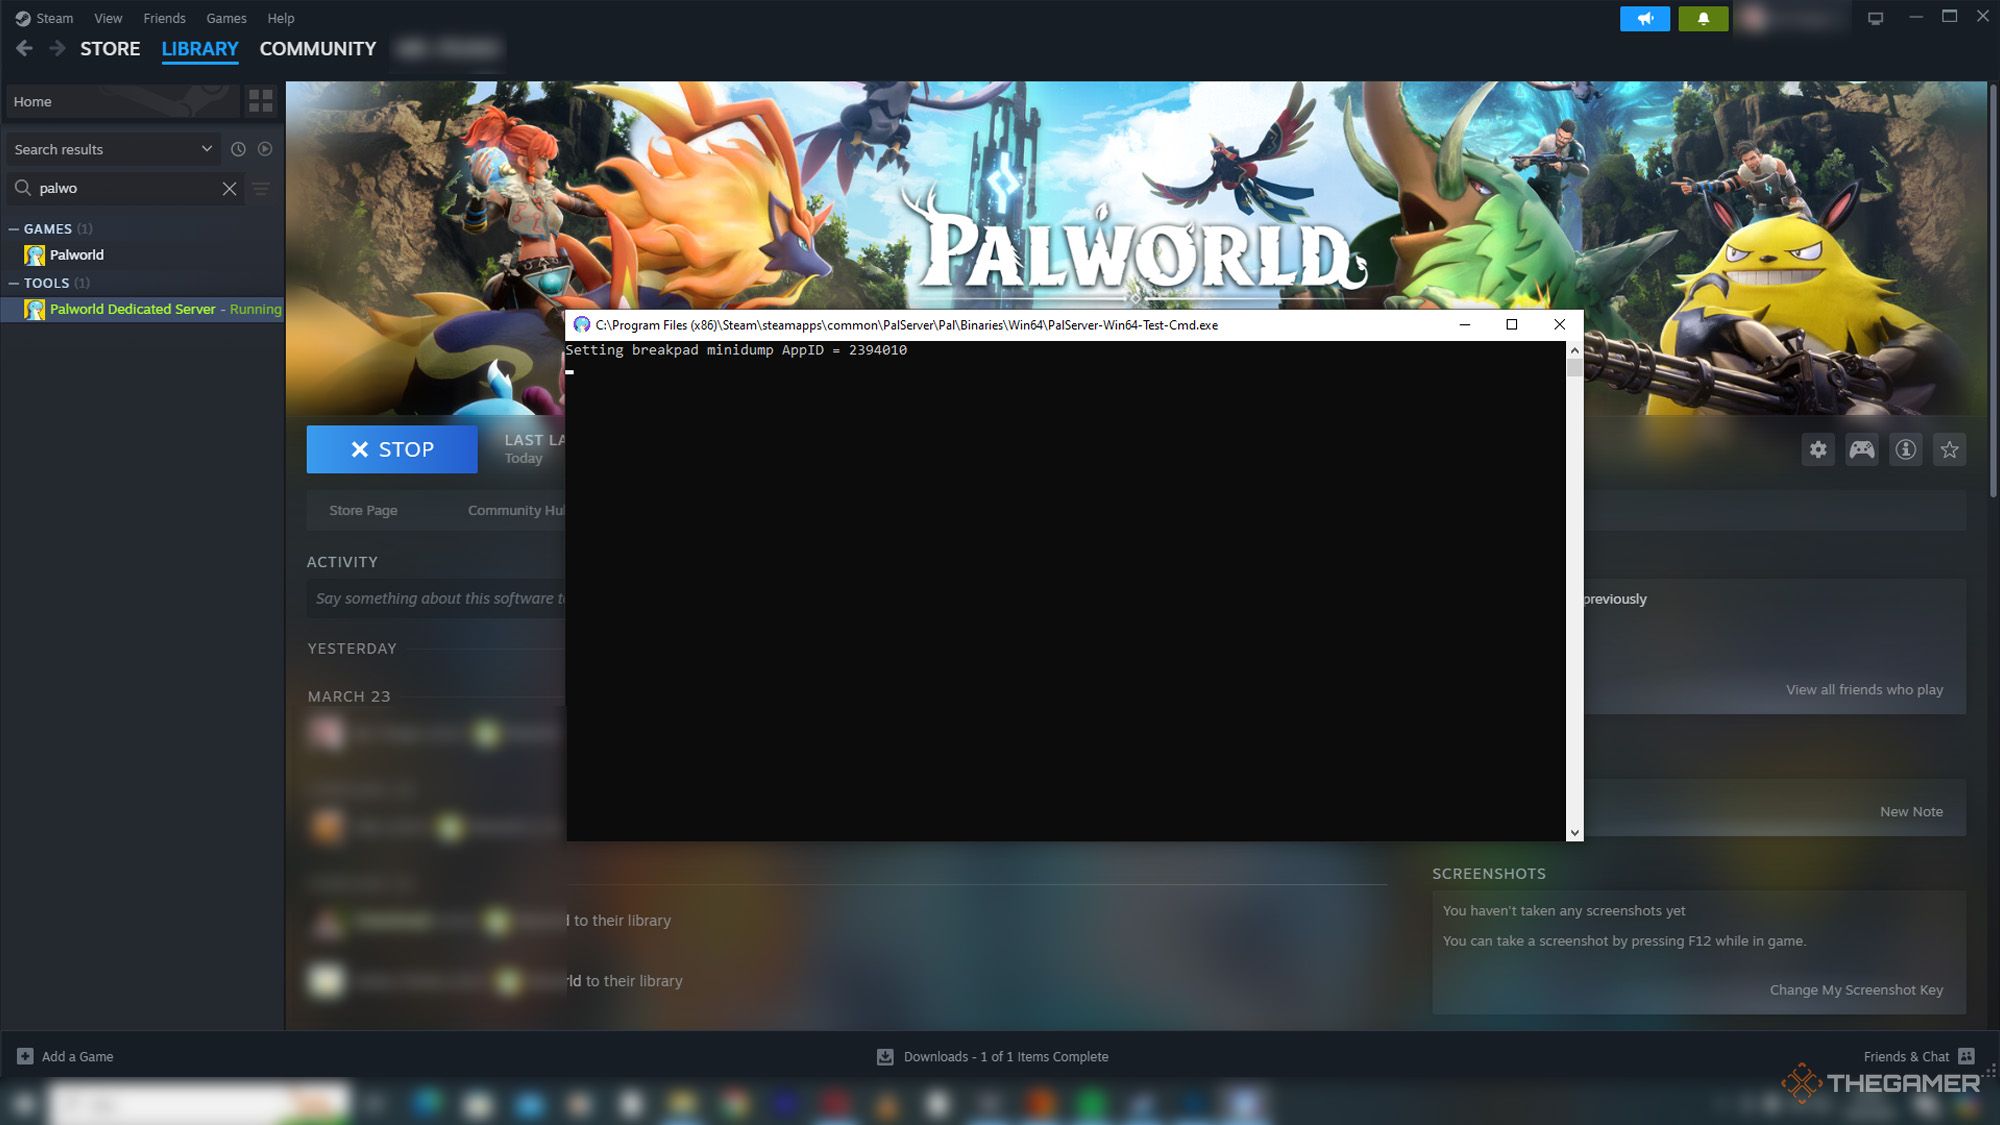
If you’ve reached this stage, it meansyour startup has been successful.
Now you could shut the Palworld Dedicated Server tool screen.
Then, you shouldset Port Forwarding to 8211.This is Pocketpair’s default port setting.
kick off the Dedicated Server folderif you want to use a different port.Afterwards, open theWorldSettings.ini filefrom this folder.
So, you’ve completed the setup for the dedicated server.
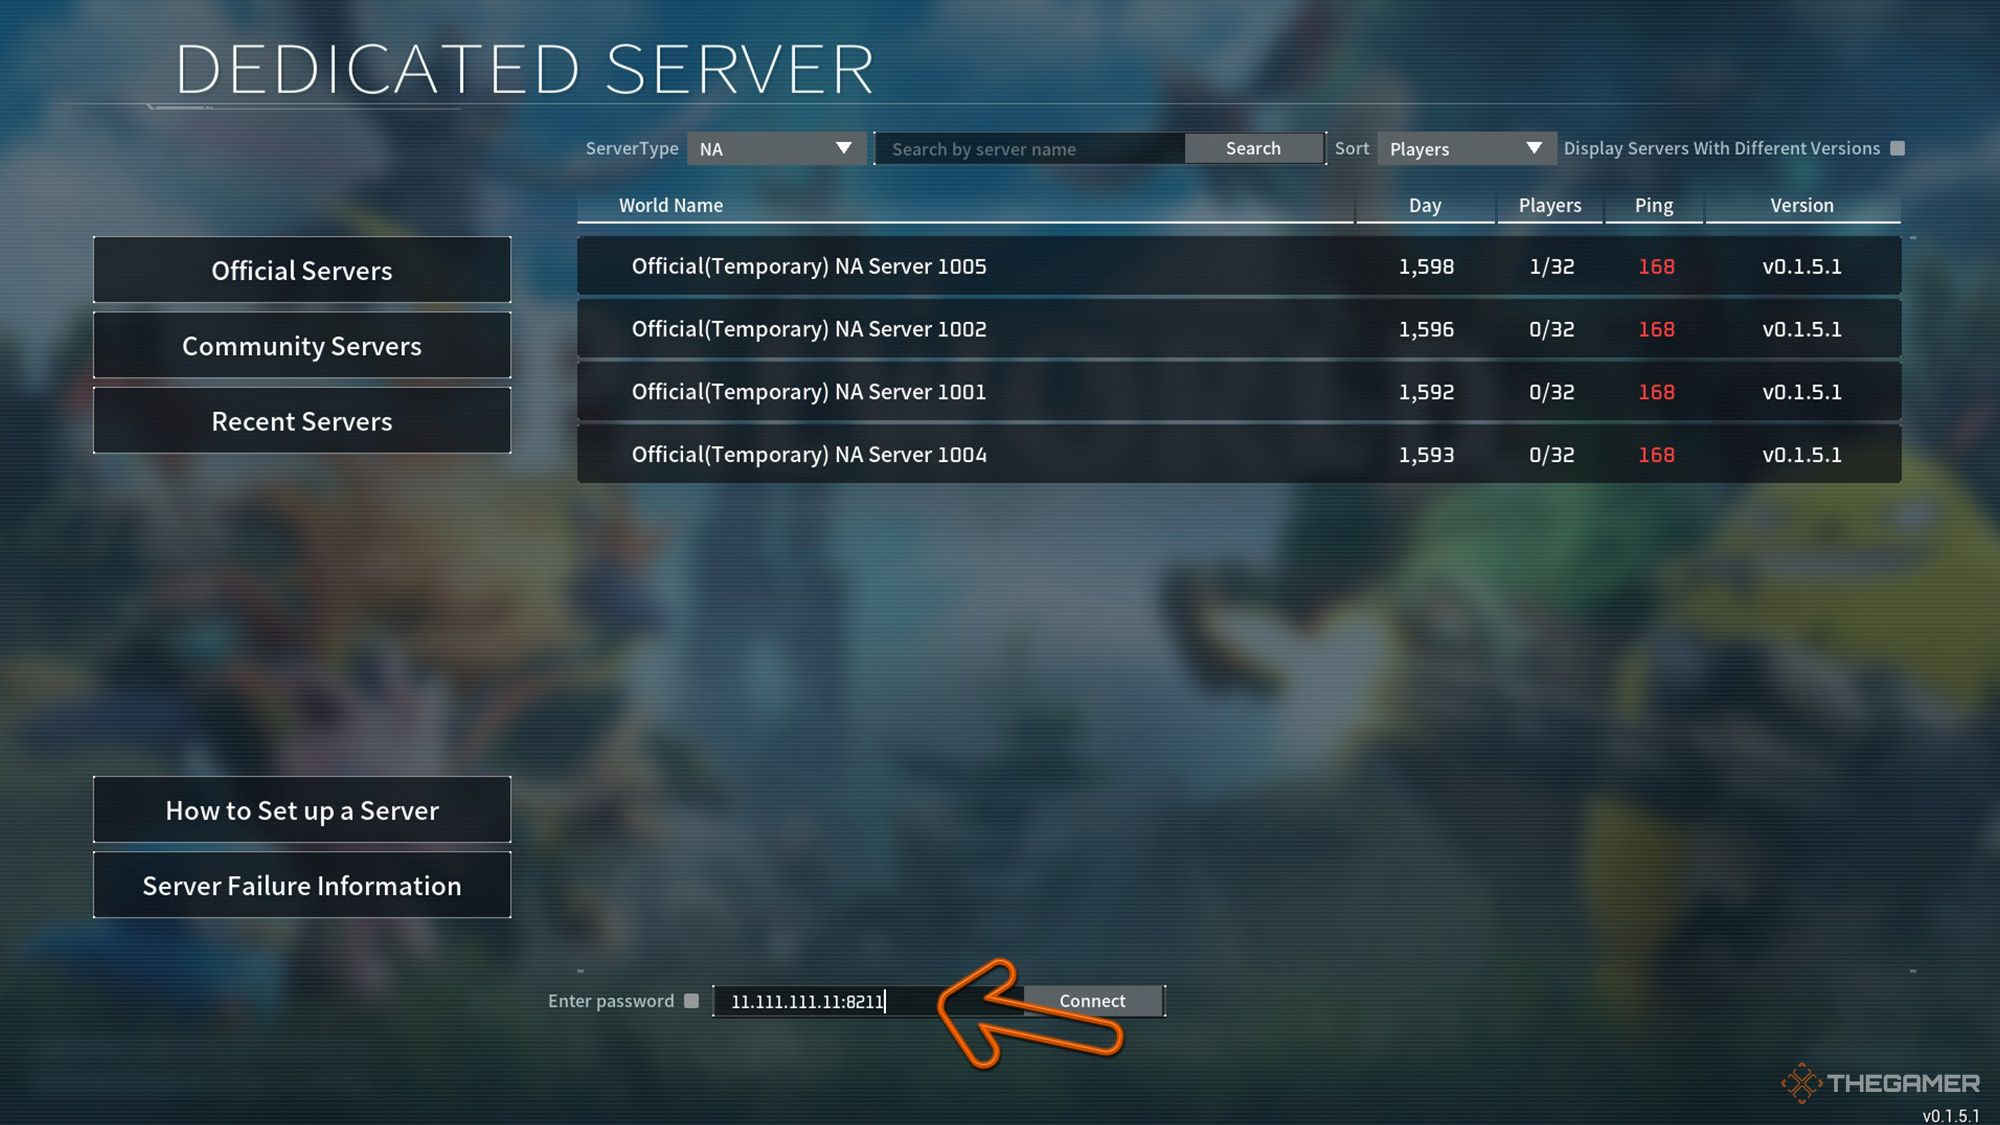
Next,other players need to have the public IP address and port numberof your server to join.
into your search engine.
Then, add “:8211” to the end of your public IP.
The result will look like “11.111.111.11:8211” as an example.
Do not share your IP address with people you do not trust.
The people who will join your server shouldselect the ‘Join Multiplayer Game’option from Palworld’s main menu.
To find your local IP,throw in ‘cmd’ into the search boxof your operating system.

Then,key in ‘ipconfig /all’ into the black window.
Your local IP address is next to the IPv4 text.
How To Move Up A Dedicated Server In Palworld?

In this case, you might be concerned about losing progress on the server on your gear.
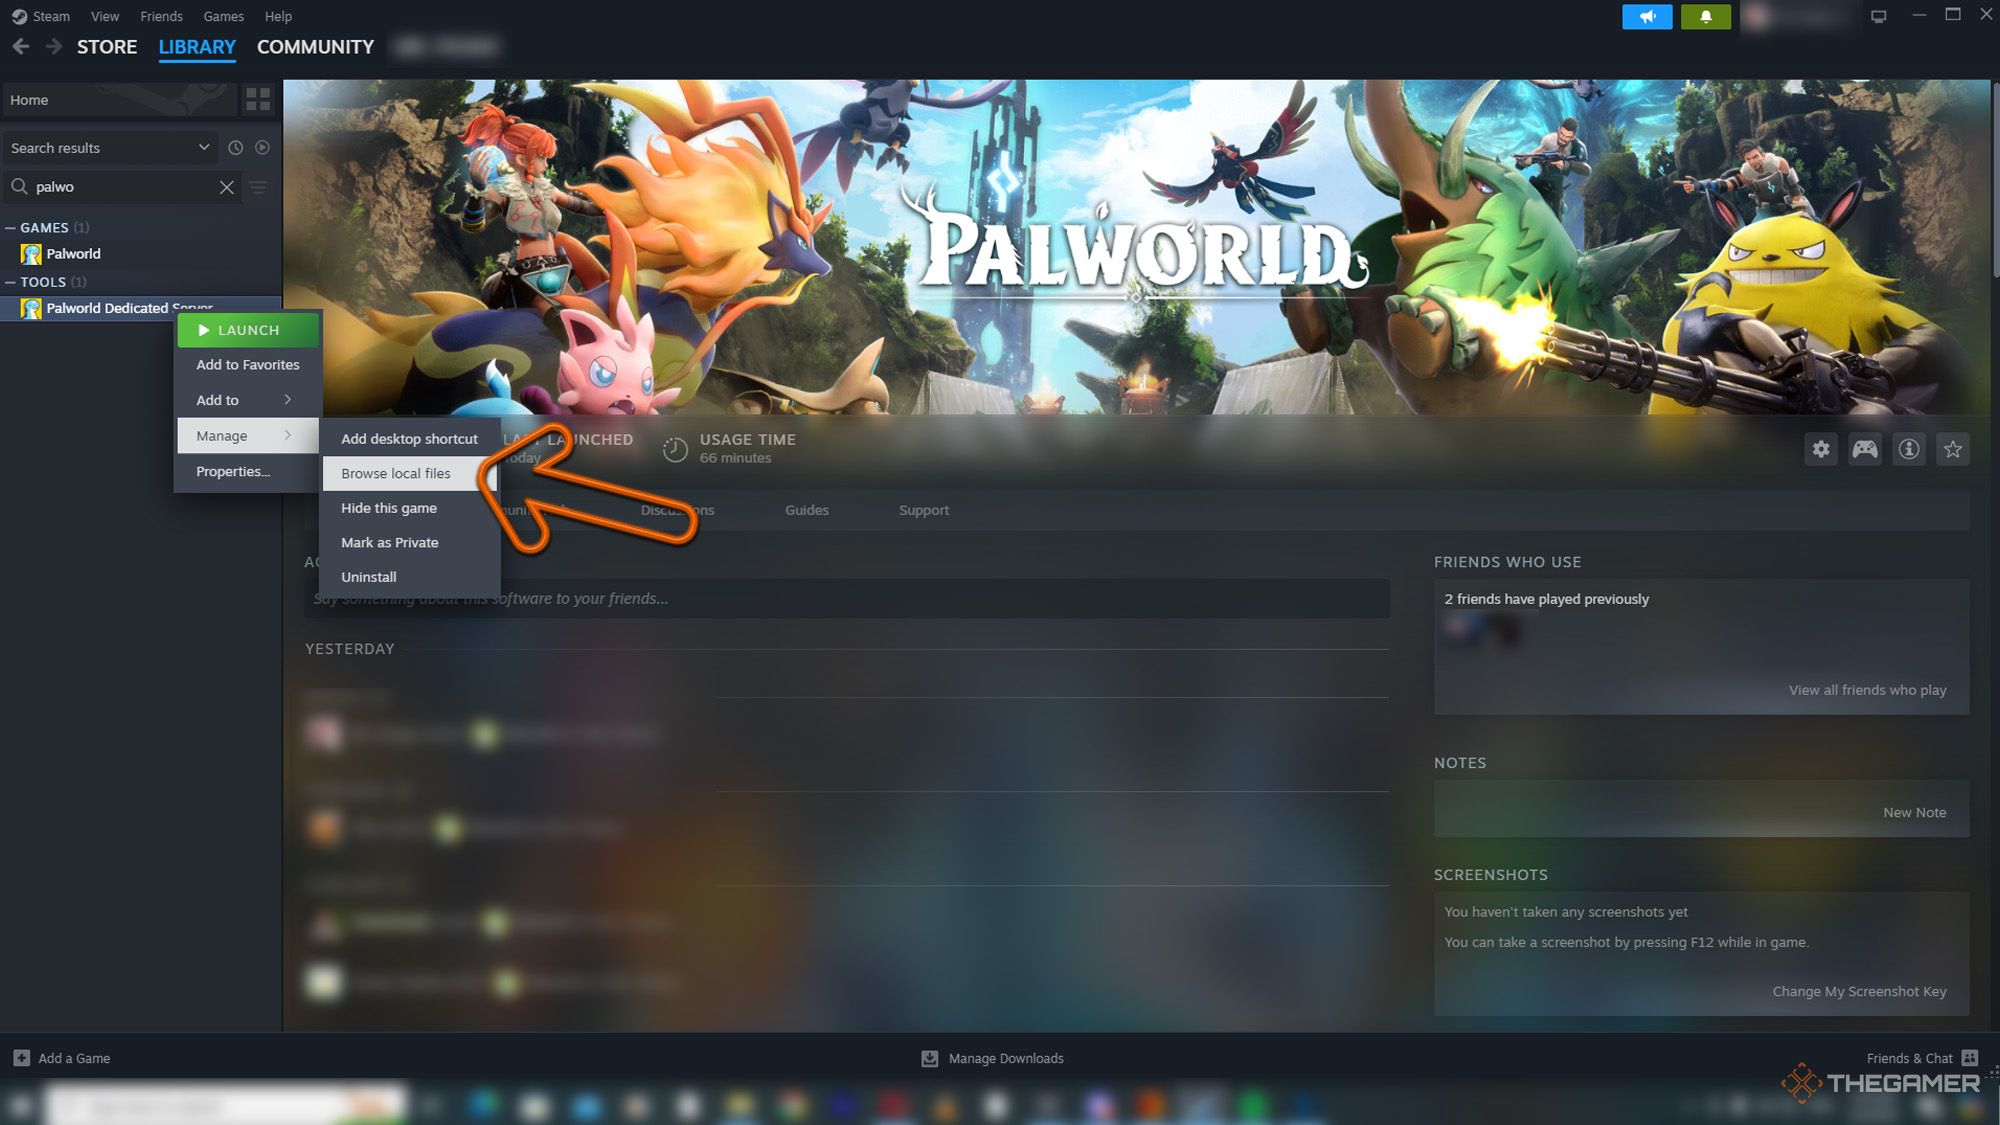
First, start by installing the Palworld Dedicated Server toolon the computer where you will transfer your server.
Right-choose the Palworld Dedicated Server in Steamandselect Manage Browse Local Filesto pull up the location of this tool.

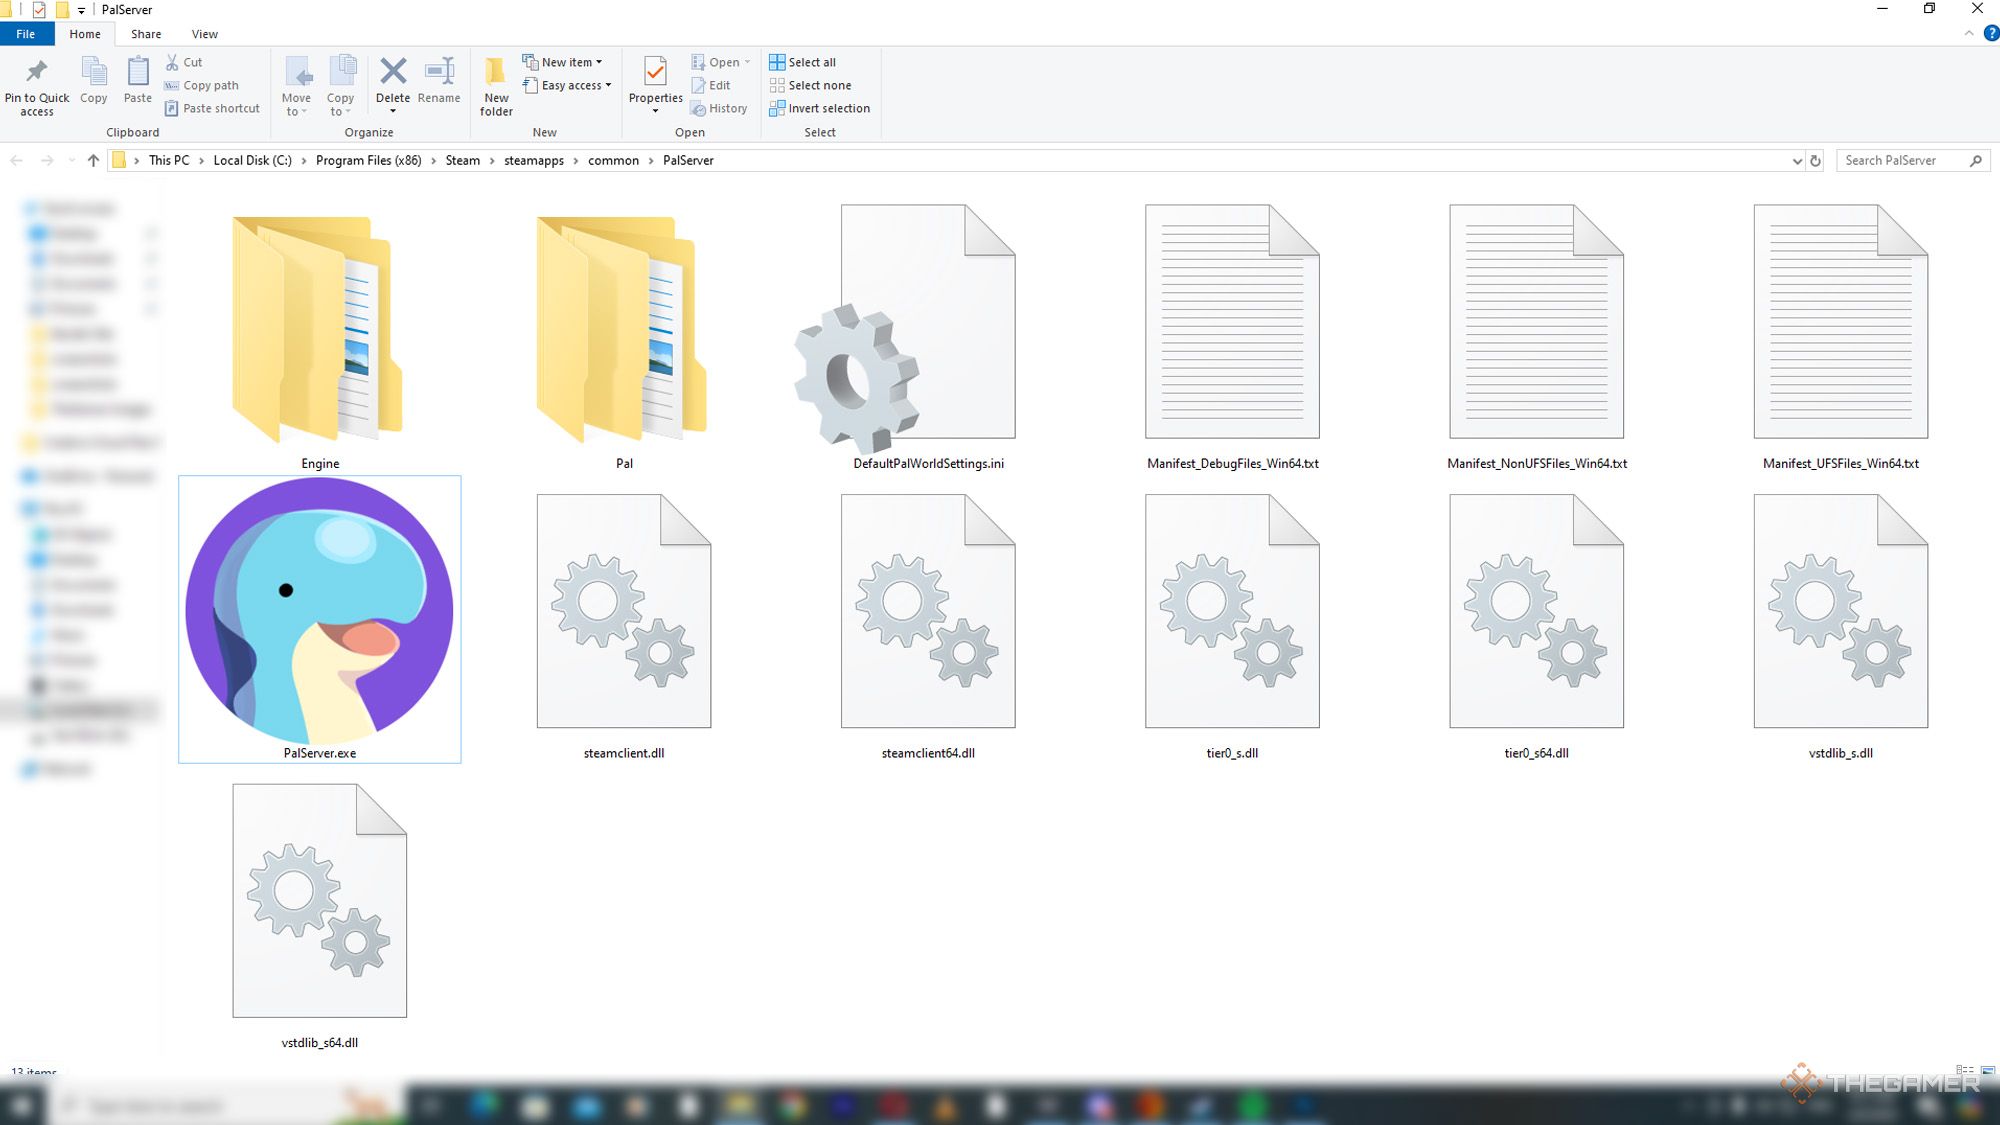
Completely copy the folder named Palserver.
At this stage, there are two important files to be moved.
Configuration File directory: steamapps\common\PalServer\Pal\Saved\Config\WindowsServer\PalWorldSettings.ini
You shouldcopy the PalWorldSettings.ini filefrom here.
World Save File directory: Steamapps\common\PalServer\Pal\Saved\SaveGames\0\
The file name you better copy from here is quite long.
For example, it could be something like B5E673274E3AC83550294D89FEF04AB8.Completely copy this file.
Then, you shouldperform Port Forwarding from the router settingsof the secondary computer.
If you haven’t changed it, the default port setting is 8211.
Depending on the situation, you may need toremove the port forwarding setting from the primary computer.
If you’re after legendary schematics, this guide is perfect for you!
